
Who This Guide Is For (And How It Stops You Locking Yourself Out)
File permissions on Linux can feel mysterious until something breaks. Perhaps a WordPress update fails, an upload directory stops working, or you run a command from a forum and suddenly your site shows “403 Forbidden”. This guide is here to make sense of what is happening, and to help you change permissions and ownership without locking yourself out of your own server.
Typical situations: from shared hosting to your own VPS
This article is useful if you are:
- On shared or control panel based hosting, and keep seeing “permission denied” errors.
- Running a small VPS with a LAMP or LEMP stack and want to understand how Apache, Nginx and PHP-FPM interact with files.
- Hosting WordPress or WooCommerce and struggling with plugin or media upload problems.
- Moving from managed hosting to an unmanaged server and want to understand what you are taking responsibility for.
If you are completely new to SSH or logging in to a server, it may help to read SSH Access for Beginners alongside this article.
What you will be able to do by the end
By the end of this guide, you should be able to:
- Read Linux permissions with
ls -land understand what they mean. - Explain the difference between user, group and others on a file.
- Use
chown,chgrpandchmodsafely on a web root. - Set sensible default permissions for a typical WordPress or PHP site.
- Avoid the classic mistakes such as
chmod -R 777or running recursive commands in the wrong place.
When to fix it yourself and when managed hosting is safer
On an unmanaged VPS or virtual dedicated server, you are responsible for:
- Permissions and ownership across your web roots.
- System updates and security patches.
- Hardening and monitoring, alongside capacity and performance planning.
For many people running one or two business sites, regularly tuning permissions, dealing with odd plugin behaviour and tracking down permission related errors can become more work than expected. In that case, Managed WordPress hosting or managed VDS can offload much of this day to day operational risk, so you focus on the site rather than the server.
For now, we will assume you want to understand what is happening, even if you later decide to hand some of it over.
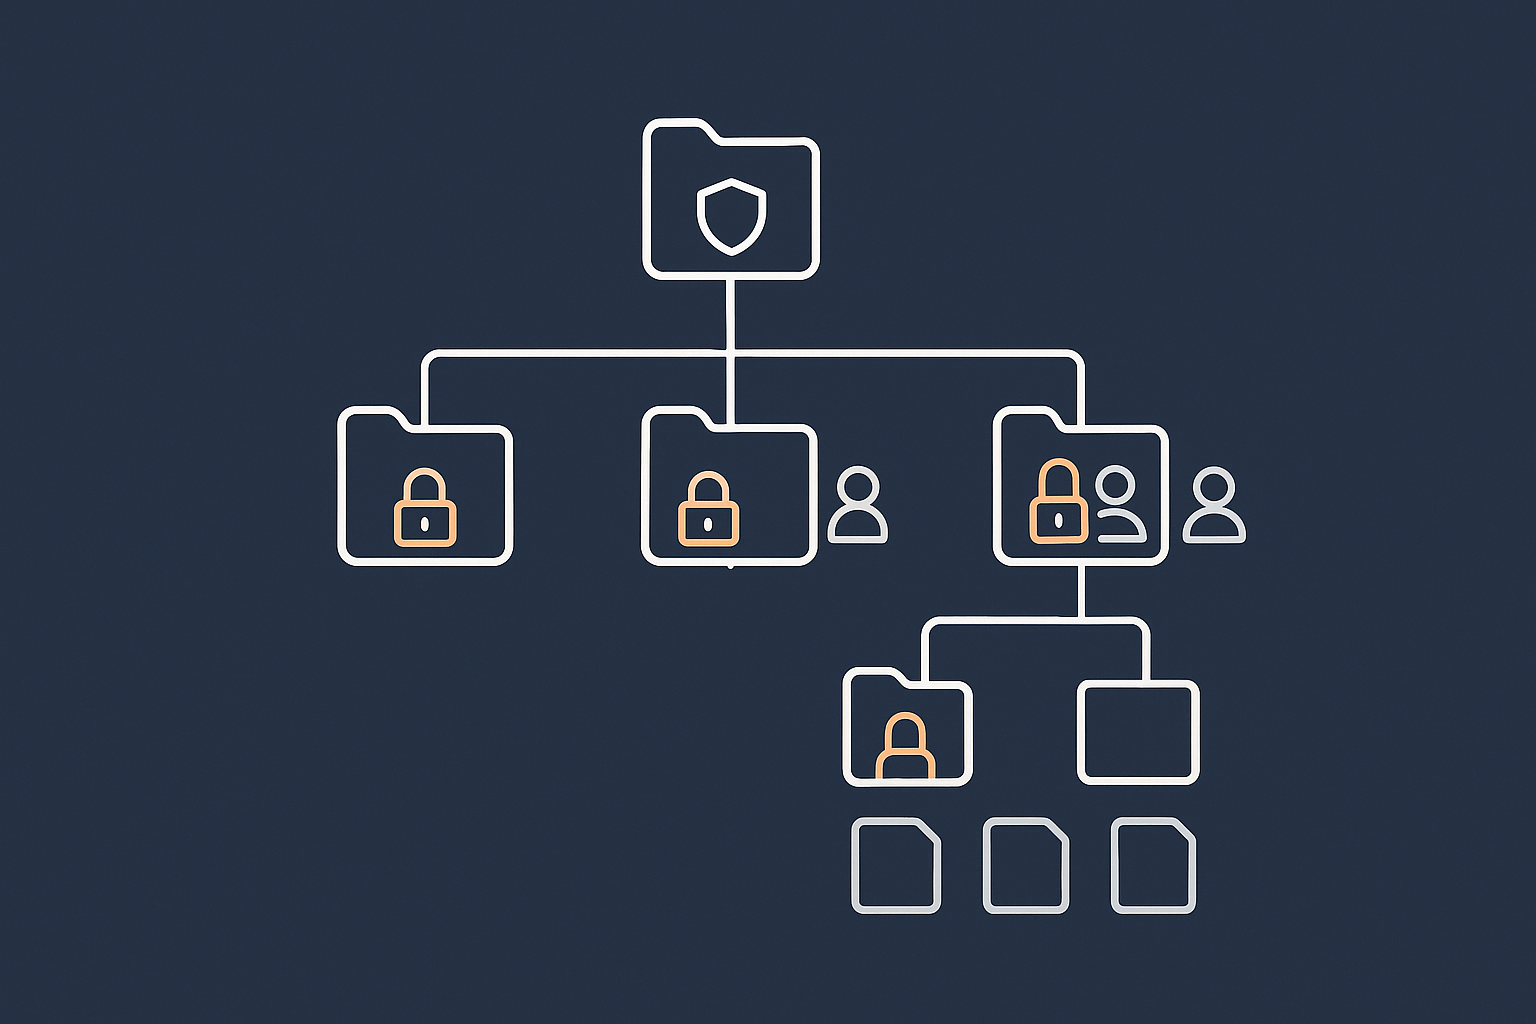
The Basics: Users, Groups, Files and Processes
What a Linux user and group actually are (in plain language)
On Linux, a user is simply an account that can own files and run processes. Human users such as alice or john are one type. System and service accounts such as www-data or nginx are another.
A group is a named collection of users. Every file has one owner user and one owner group. Groups are a convenient way to allow several users to work on the same files without giving everything to everyone.
Two important files store this information:
/etc/passwdlists users./etc/grouplists groups.
You will rarely edit these directly on a web server, but it helps to know they exist.
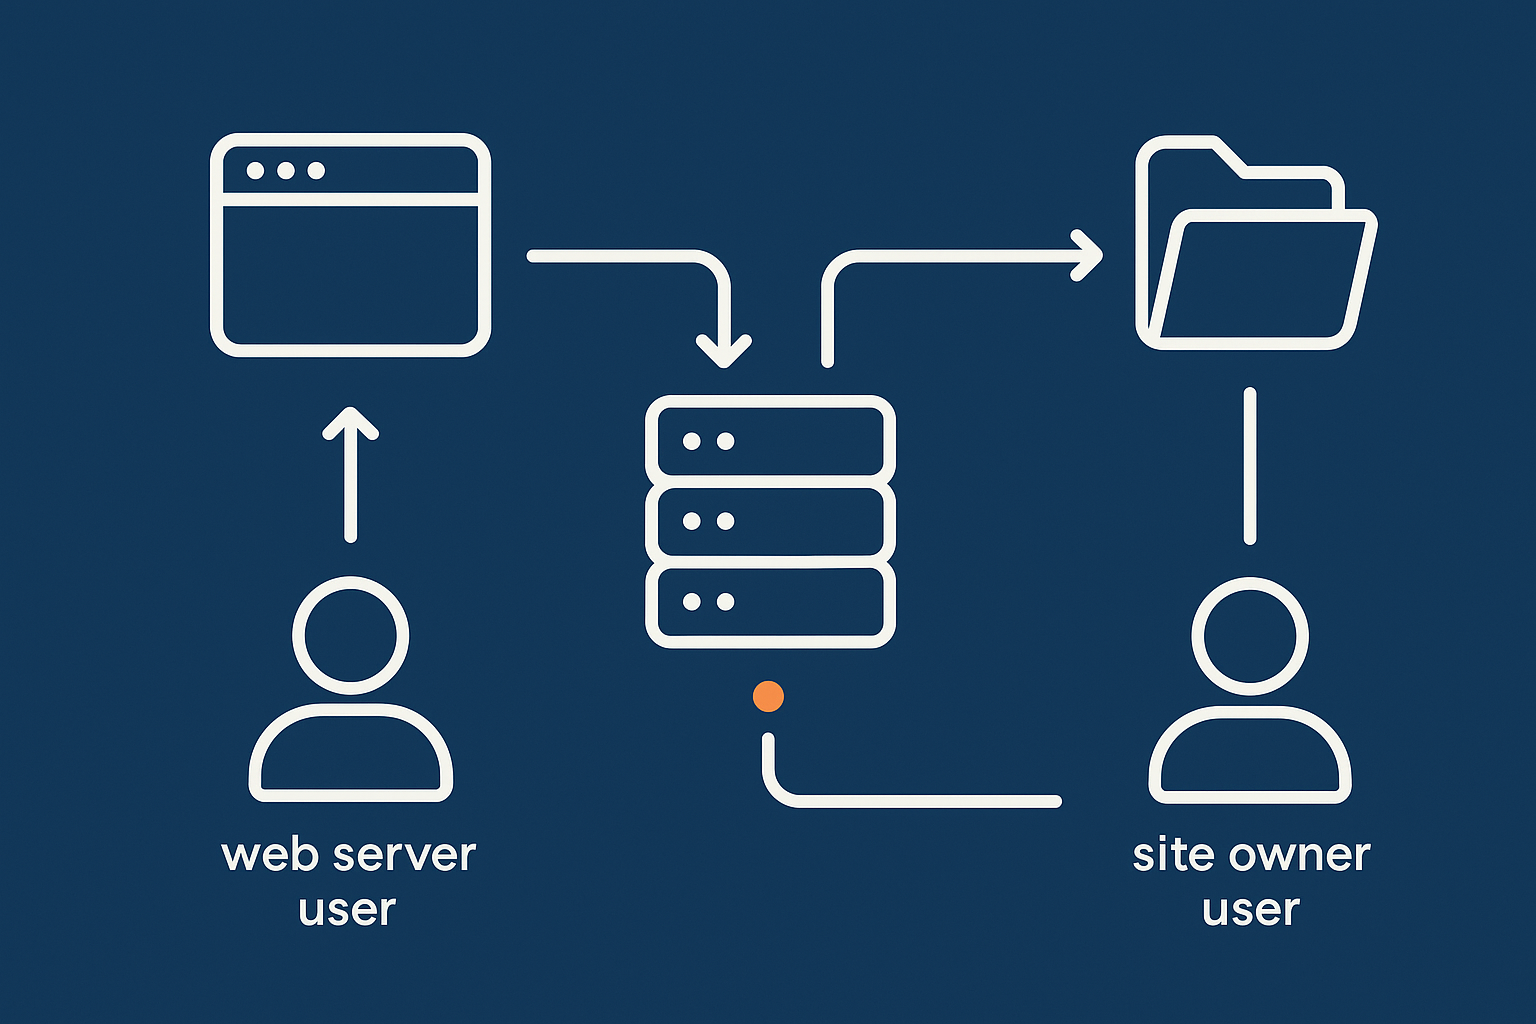
How web server processes run: apache, nginx, php-fpm users
Your web server software does not run as “you”. It runs as its own user, for example:
www-dataon Debian / Ubuntu for Apache or Nginx plus PHP-FPM.apacheornginxon CentOS / AlmaLinux / Rocky Linux.
When a visitor loads your site, the request is handled by:
- Apache or Nginx, running as a specific user.
- Often PHP-FPM, running pool processes as a user configured for that site or pool.
- These processes read and, sometimes, write files from your web root.
This means permissions must allow the web server user (or its group) to read PHP files and assets, and to write only where necessary, such as uploads or caches.
Why ownership matters for a WordPress or WooCommerce site
WordPress and WooCommerce need to:
- Read your PHP files and themes.
- Write uploaded media into
wp-content/uploads. - Create or modify files during plugin, theme and core updates.
If your site files are owned by your SSH user but the web server user has no write permissions where needed, updates and uploads will fail. If the web server user owns everything and is too powerful, a vulnerable plugin could write to more than it should.
Ownership and groups are how you strike a balance between convenience and safety.
Reading File Permissions Safely: ls -l Explained
Using ls -l to inspect a directory
The safest first step when something looks wrong is to inspect, not change. To list files with detailed information, including permissions, run:
ls -l /var/wwwThis command:
- Lists files in
/var/www(a common web root path). - Shows one line per file, with permissions, owner, group, size and date.
If your web root is elsewhere, for example /home/myuser/public_html, replace the path accordingly. If you run this in the wrong directory, nothing breaks; you just see different files.
Breaking down the permission string (r, w, x for user, group, others)
A typical line from ls -l might look like this:
-rw-r--r-- 1 myuser www-data 1234 Dec 1 12:00 index.phpRead it from left to right:
-first character: type (-for file,dfor directory).rw-r--r--next 9 characters: permissions.myuser: owner user.www-data: owner group.- Then size, date and filename.
The 9 permission characters are split into three groups of three:
- First three: owner user permissions.
- Next three: group permissions.
- Last three: others (everyone else).
Within each group:
rmeans read.wmeans write (change or delete).xmeans execute (run) for files, or “enter / traverse” for directories.
So -rw-r--r-- means:
- Owner:
rw-can read and write. - Group:
r--can read only. - Others:
r--can read only.
Quick mental model: “who can read, who can change, who can run”
When you look at ls -l, train yourself to ask three questions:
- Who can read this file or directory?
- Who can change or delete it?
- Who can run it (if it is a script) or enter it (if it is a directory)?
This mental model works across all the examples in this article.
Exercise: checking your web root (e.g. /var/www)
To get a feel for your current situation, run:
cd /var/www
pwd
ls -l
This sequence:
cd /var/wwwchanges directory to your web root (adjust if different).pwdprints the current directory so you confirm where you are.ls -llists the files with details.
Nothing is modified by this. You can safely do this in production. You might want to copy and paste the output into a note for later, especially before you start changing anything.
Ownership: chown, chgrp and Common Web Server Patterns
What owner and group mean on a web server
Every file has an owner and a group. On a web server, a common pattern is:
- Files are owned by your SSH or SFTP user, so you can edit and deploy code.
- Group is set to the web server group, so the web server can read and, where needed, write.
For example:
-rw-r--r-- 1 deploy www-data 1234 Dec 1 12:00 index.phpHere:
- User
deployowns the file and has write access. - Group
www-datacan read the file. - Others can also read the file.
Typical ownership setups for WordPress
One-user model on small VPS (e.g. user: www-data group)
On a simple VPS, administrators sometimes run everything under one user, often www-data:
-rw-r--r-- 1 www-data www-data 1234 Dec 1 12:00 index.phpThis is straightforward but means the web server user owns all files. You will usually connect over SSH as a different user and use sudo to edit or deploy files under www-data.
It keeps things simple but can blur the line between “code you deploy” and “data the web server writes”.
Panel based hosting (cPanel style account users)
On panel based hosting such as cPanel or Plesk, each site (or account) typically has its own user, like myaccount:
-rw-r--r-- 1 myaccount myaccount 1234 Dec 1 12:00 index.phpThe web server is configured so it runs PHP as this user, not a shared user like www-data. This isolates sites from one another and simplifies ownership: everything is owned by the account user.
In this environment, using commands like chown is rarely needed and often handled by the control panel. If you find yourself running recursive chown via SSH frequently, it can be a sign that panel tools or managed hosting might be more comfortable.
How to safely use chown without breaking everything
chown changes the owner and optionally the group of files. Used carefully on the correct directory, it is very useful. Used at the root of the filesystem, it can break the server.
To change ownership of a single file:
sudo chown myuser:www-data index.phpThis command:
- Changes the owner of
index.phpto usermyuserand groupwww-data. - Requires
sudoif you are not already the owner.
To apply this recursively to a whole directory tree, you add -R. This is powerful and potentially destructive if used in the wrong place, so be deliberate:
cd /var/www/mysite
pwd
sudo chown -R myuser:www-data .
Here:
cdandpwdconfirm you are in the correct web root.sudo chown -R myuser:www-data .changes owner and group for everything under the current directory.
To “undo” an incorrect chown, you must run it again with the right users/groups, which is why keeping notes of your intended ownership is important.
Danger zone: recursive chown on / or system paths
This is one of the most dangerous mistakes on Linux:
sudo chown -R myuser:myuser /This will attempt to change ownership of every file on the system. Many system files must be owned by specific users such as root or service accounts. Changing them can make the system unbootable or stop services from starting.
Safer habits:
- Never use
chown -Rwith/,/etc,/varor similar as the path. - Use
cdandpwdto position yourself inside the correct site directory, then runchown -Rwith.as the path. - Keep a record of your “correct” ownership scheme so you can restore it deliberately if something changes.
chmod Without Fear: What 644, 755 and 777 Actually Do
Symbolic vs numeric permissions (u/g/o, +x vs 755)
There are two common ways to set permissions:
- Symbolic, such as
chmod u+x script.sh, which says “add execute for the user”. - Numeric, such as
chmod 755 script.sh, which sets all three permission groups in one go.
The numeric form uses three digits: owner, group and others. Each digit is the sum of:
- 4 for read.
- 2 for write.
- 1 for execute.
So:
7means 4 + 2 + 1 = read, write, execute.6means 4 + 2 = read, write.5means 4 + 1 = read, execute.4means read only.
Understanding common modes: 600, 644, 664, 700, 755, 775, 777
- 600: owner can read/write, group and others have no access. Good for private config files or SSH keys.
- 644: owner can read/write, everyone else can read. Typical for public web files (HTML, CSS, JS, most PHP files).
- 664: owner and group can read/write, others can read. Useful where both owner and group need to modify files.
- 700: owner can read/write/execute, no access for others. Good for private directories or scripts.
- 755: owner can read/write/execute, others can read/execute. Standard for web directories and executable scripts that others can read but not modify.
- 775: owner and group can read/write/execute, others can read/execute. Useful when a shared group maintains scripts or directories.
- 777: everyone can read/write/execute. Convenient but usually too open, especially on shared servers.
Why “chmod -R 777” is almost always a bad idea
When a plugin refuses to update or WordPress cannot write to a directory, it is tempting to run:
chmod -R 777 wp-contentThis makes the directory and all files world writable. It often “fixes” the symptom, because now any process can write there. However:
- Any code executed by the web server can now modify files, which widens the impact if a plugin or theme is compromised.
- On shared hosting, other users might be able to write to your files, depending on the underlying configuration.
It is usually better to adjust ownership and group membership or use 755/775 on directories and 644/664 on files than to rely on 777.
Examples: adjusting one file vs a whole directory tree
To change a single file to 644:
chmod 644 index.phpTo change a directory to 755:
chmod 755 wp-contentTo apply recursively, use -R, but note that directories and files usually need different permissions. We will look at safe patterns for that shortly.
If you “over tighten” permissions and something breaks, you can revert using your notes on default patterns or by mirroring the permissions from a known working site.
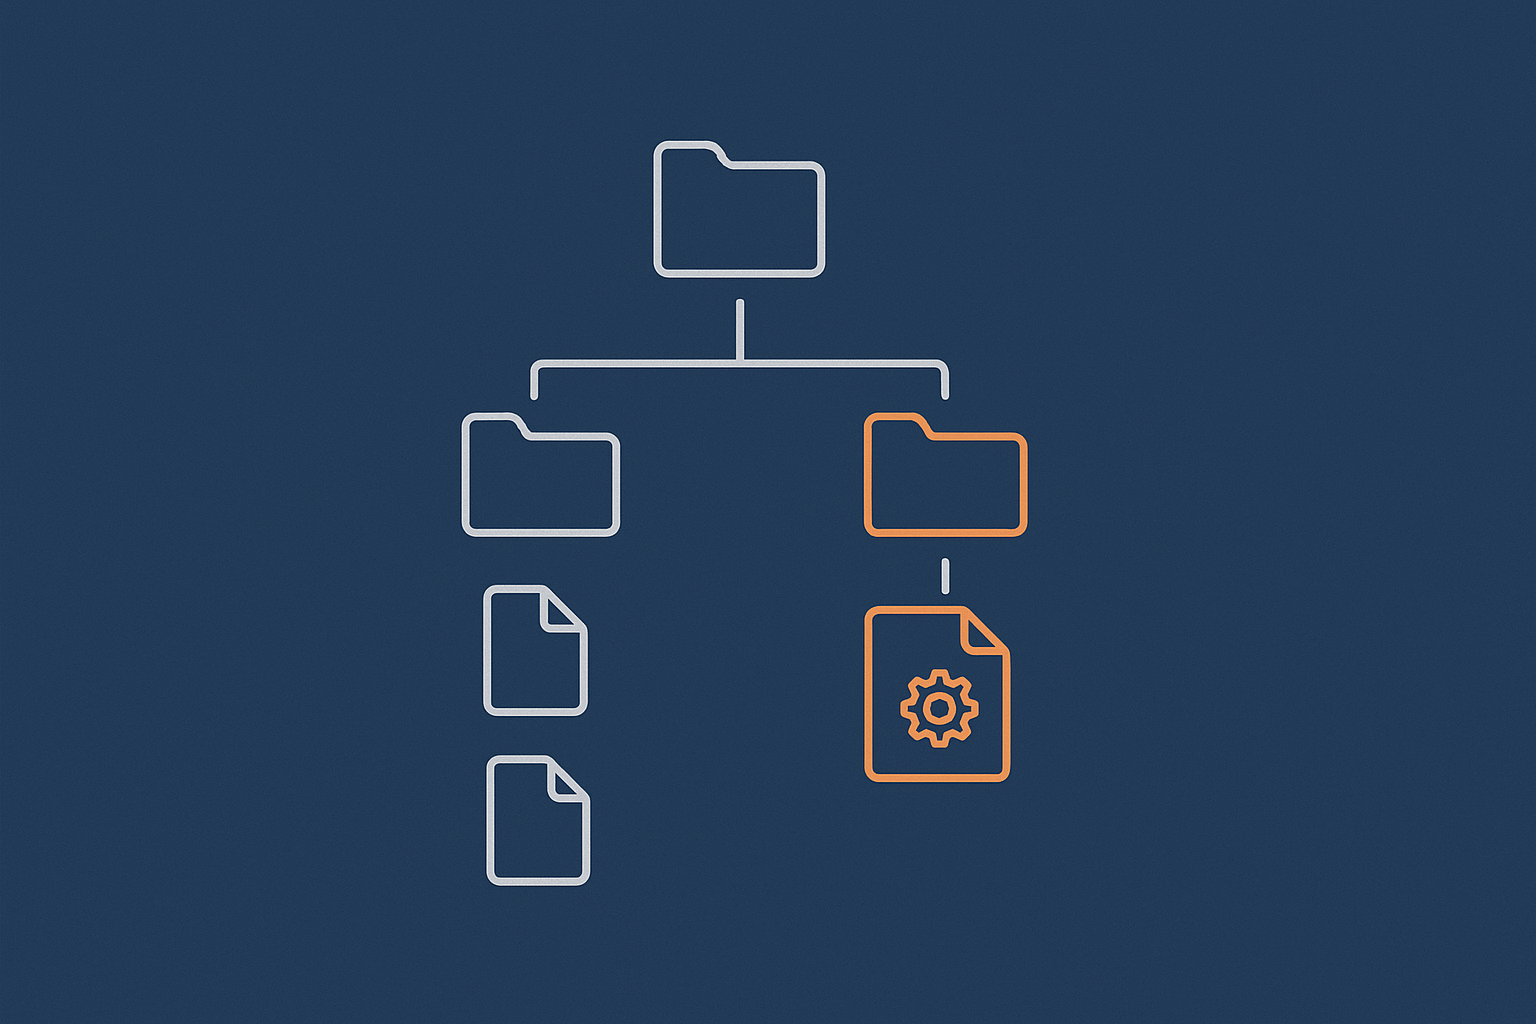
Safe Default Permissions for a Typical Web Root
General pattern: directories 755, files 644
For a typical PHP / WordPress site, a solid starting point is:
- Directories:
755. - Files:
644.
This means:
- Owner can read and write all files and directories.
- Everyone can read files and traverse directories, which is required for normal web access.
Extra sensitive files: wp-config.php, .env and SSH keys
Some files should be more restricted:
wp-config.phpcontains database credentials and keys..envfiles often contain secrets for frameworks.- SSH keys under
~/.sshmust be private to function correctly.
For these kinds of files, 600 is often more appropriate:
chmod 600 wp-config.phpThis allows only the owner to read and write. As long as the web server runs as the file owner (or reads through PHP which runs as that user), this will work.
Be careful not to over restrict. If you set 000 on a file, nothing can read it, including the web server.
Scripts that must be executable (cron scripts, shell tools)
Some scripts need the execute bit set:
- Custom shell scripts called from cron.
- Maintenance tools in your project.
If you have a script scripts/backup.sh, you might use:
chmod 700 scripts/backup.shThis allows only the owner to run it. If multiple admins share a group that should run it, 750 or 770 may be appropriate, combined with suitable group ownership.
One-liner patterns to reset a broken tree (with explanations)
When permissions across a site have become inconsistent, you can reset them using find. These commands assume your site is at /var/www/mysite.
1. Reset directories to 755
cd /var/www/mysite
pwd
find . -type d -exec chmod 755 {} \;
Explanation:
cdandpwdconfirm you are in the correct directory.find . -type dfinds all directories under the current path.-exec chmod 755 {} \;runschmod 755on each directory found.
2. Reset files to 644
find . -type f -exec chmod 644 {} \;This sets all regular files to 644. If you have specific scripts that need execute permissions, you can reapply them afterwards.
These patterns are generally safe within your site directory. If you apply them at / or across system directories, they can cause serious problems, so always use cd and pwd to anchor yourself in the right place.
Making Permissions Work With PHP, WordPress and Plugin Updates
How PHP-FPM and web server users write to disk
When WordPress writes to disk, it usually does so through PHP. With PHP-FPM, each pool can run as a different user. Common patterns include:
- PHP-FPM pool runs as
www-dataand owns or has group write access to specific directories likewp-content/uploads. - PHP-FPM pool runs as the site user (panel based setups) and therefore can write wherever that user can.
If PHP-FPM runs as www-data but your files are owned by deploy:deploy with 644/755 permissions, WordPress will not be able to write anywhere that does not grant www-data write access via group or others permissions.
Directories WordPress needs to write to (uploads, cache, updates)
WordPress typically needs write access to:
wp-content/uploadsand its subdirectories.wp-content/cacheor similar, for caching plugins.- Temporarily, plugin and theme directories during updates.
On a small VPS where the site user is myuser and PHP-FPM runs as www-data, a common pattern is:
- Ownership:
myuser:www-datafor the whole web root. - Directories: 755 or 775.
- Files: 644 or 664.
To allow both myuser and www-data to write, you can use group write (664/775) and ensure your user is in the www-data group.
Using groups to allow both your SSH user and the web server to work safely
Suppose:
- Your SSH user is
deploy. - The web server user and group are
www-data.
You can:
- Add
deployto thewww-datagroup. - Set the group of the web root to
www-data. - Use group write permissions where needed.
To add deploy to www-data (Debian/Ubuntu style):
sudo usermod -aG www-data deployThis modifies the group membership of deploy. You will need to log out and back in for it to take effect. Used incorrectly on the wrong user, this will not usually break the system, but keep track of which users are added to powerful groups.
Then in the site directory:
cd /var/www/mysite
pwd
sudo chown -R deploy:www-data .
find . -type d -exec chmod 775 {} \;
find . -type f -exec chmod 664 {} \;
This results in:
- Owner:
deployhas full control. - Group:
www-datahas read/write on all files and directories. - Others: read access only.
This pattern works well where WordPress needs to manage its own updates and file writes.
Common symptoms of wrong permissions in WordPress and WooCommerce
Symptoms that often point to permissions or ownership issues include:
- “Could not create directory” during plugin or theme installation.
- Media uploads fail with “Unable to create directory” errors.
- White screen or 500 errors immediately after changing file or directory permissions.
- WooCommerce unable to write logs or generate temporary files for exports.
When this happens, check:
ls -lon the relevant directories, especiallywp-content.- Web server and PHP logs; our article on Understanding System Logs on Linux can help you locate them.
Step-by-Step: Fixing a Broken Web Root Without Locking Yourself Out
1. Stop, check backups and confirm you have console or provider support
Before large changes on a live site:
- Make sure you have a recent backup or snapshot from your VPS or VDS provider.
- Confirm you can reach a console (for example, via your provider’s control panel) in case SSH stops working.
- Note down the current ownership and permissions for a few key paths (
ls -loutput) so you can reference them later.
If the site is very important and downtime is costly, this is where a managed environment or managed virtual dedicated server can be worth considering.
2. Identify the correct user and group for your site
Find out:
- Which user owns most of the site files.
- Which user the web server or PHP-FPM is running as.
In your web root directory:
cd /var/www/mysite
pwd
ls -ld .
This shows the ownership of the directory itself.
To see which user Apache is using on a Debian/Ubuntu system, you can run:
ps aux | grep -E 'apache2|httpd|nginx' | headLook at the user column for the main processes. This command is read only and safe. It simply lists processes and filters the output.
3. Reset ownership safely for just the site directory
Once you know which user and group you want, set ownership at the site root. For example, if you decide:
- Owner user:
deploy. - Group:
www-data.
Then:
cd /var/www/mysite
pwd
sudo chown -R deploy:www-data .
Check a few entries afterwards:
ls -l | headThis should now show deploy www-data for owner and group.
4. Reset directory and file permissions separately
Now set a sensible baseline:
cd /var/www/mysite
pwd

# Directories
find . -type d -exec chmod 755 {} \;

# Files
find . -type f -exec chmod 644 {} \;
If you want WordPress to manage updates and uploads more easily in a shared group model, use 775/664 instead of 755/644 and ensure the group is the web server group, as described earlier.
After resetting, tighten sensitive files such as wp-config.php:
chmod 600 wp-config.phpCheck that the file remains owned by the correct user and group with ls -l wp-config.php.
5. Test carefully: SSH access, web access, WordPress updates
After changes, test in this order:
- SSH access: confirm you can still log in and
cdinto your site. - Web access: load the homepage and a few internal pages anonymously.
- Admin actions: log into WordPress, try a media upload, and if appropriate, a small plugin update.
If something fails, note the exact error message, check permissions on the relevant directory, and review logs. Avoid immediately loosening everything to 777; instead, adjust ownership or group write on specific paths that need it.
Avoiding Common Permission Mistakes on a Live Server
Running chmod or chown from the wrong directory
One of the easiest mistakes is running a recursive command where you think you are in /var/www/mysite but are actually in /var/www or even your home directory.
Safer pattern for any destructive command (recursive or affecting many files):
cd /var/www/mysite
pwd
echo "About to change permissions in: $(pwd)"
# Now run your chmod/chown here
echo is harmless and forces you to look at the target path one more time.
Mixing up root and your normal user
Running commands as root or with sudo gives you the power to change anything, including things that should not be touched. Where possible:
- Work as a normal user and only use
sudowhen necessary. - Prefer adjusting ownership so that your normal user can manage web files without constantly becoming root.
If you find you must run many commands as root to manage your site, it may be a sign that ownership is not set up well or that a managed environment could reduce friction.
Breaking log directories or tmp directories by accident
Log and temporary directories, such as /var/log and /tmp, have specific ownership and permissions. Changing them recursively with broad patterns like:
sudo chmod -R 755 /varcan stop services from writing logs or using temp space correctly.
Keep your changes scoped:
- Limit
chownandchmodto your web root directories. - Use patterns like
cd /var/www/mysiteand then work with., not/varor/.
Practical safety habits: dry runs, echoing the directory, using sudo sparingly
Some practical habits that help:
- Dry runs: For
find, test the selection first:find . -type d | headThen run with
-execonce you are sure the right items are listed. - Echo the directory: As shown earlier, use
pwdandechobefore any recursive command. - Record changes: Keep a simple log of commands you run when changing ownership and permissions, so you can reverse or repeat them reliably.
For broader safe operating habits on new servers, our article First 48 Hours on a New Linux VPS is a helpful companion.
When Managed Servers or Panel Hosting Are the Safer Option
Signs you should not be hand tuning permissions regularly
It may be time to consider a more managed approach if:
- You find yourself repeatedly fixing permission errors after every update or plugin change.
- You feel uneasy running commands like
chown -Ron a production server. - Your main work is content and business tasks, not server administration.
- Downtime or mistakes have a direct financial impact and you want to reduce operational risk.
How managed VDS or managed WordPress hosting reduce permission headaches
A managed virtual dedicated server or Managed WordPress hosting can:
- Provide a standard, well tested layout for users, groups and permissions.
- Handle OS updates, security patches and many everyday configuration tasks.
- Help diagnose and correct permission problems as part of support, rather than you having to debug everything yourself.
This is not necessary for everyone. Many people are comfortable managing an unmanaged VPS once they understand the basics, particularly if they have a test server to practise on and good backups. The important thing is to choose a level of responsibility that fits your time and comfort level.
Next steps and further reading
Permissions and ownership are one part of running a secure and reliable server. You may also find these topics helpful:
- Basic Linux Firewall Setup for network level protection.
- How to Safely Update and Patch a Linux Server for keeping the system itself healthy.
If you would rather not think about permissions and ownership on a daily basis, exploring G7Cloud virtual dedicated servers or Managed WordPress hosting is a natural next step. You keep control of your sites while letting a managed platform or team handle much of the underlying server complexity.