
Who This Guide Is For (And What You Will Avoid Breaking)
This guide is for anyone running a Linux VPS or virtual dedicated server for websites, especially WordPress or other PHP applications. You might have one small business site, or you may be moving towards multiple sites and more formal deployments.
If you are completely new to Linux permissions, you may want to read Understanding Linux File Permissions and Ownership on a Web Server first, then come back here for the web specific details.
Typical situations where permissions go wrong
Permissions issues on web servers often show up as:
- WordPress cannot update itself or install plugins and themes.
- File uploads fail with “permission denied” or HTTP 500 errors.
- Static files like CSS and images start returning 403 Forbidden.
- After using
sudo, some files become owned byrootand no longer editable by your normal user. - Someone tries to fix things with
chmod -R 777and now everything feels unstable.
The aim here is to help you avoid these situations and to repair them safely when they do happen.
What you will be able to do by the end
By the end of this guide you should be able to:
- Explain what
www-datais and which user your web server actually runs as. - Choose sensible default permissions for a web root and WordPress install.
- Use
chown,chmodandsudodeliberately, rather than reactively. - Set up ownership patterns that work for single users, agencies and deployment tools.
- Diagnose permission related errors calmly and fix them without resorting to
777.
If you ever feel this work is consuming too much time, you can also consider a managed environment. G7Cloud offers both managed and unmanaged virtual dedicated servers if you prefer to offload more of the operational responsibility.
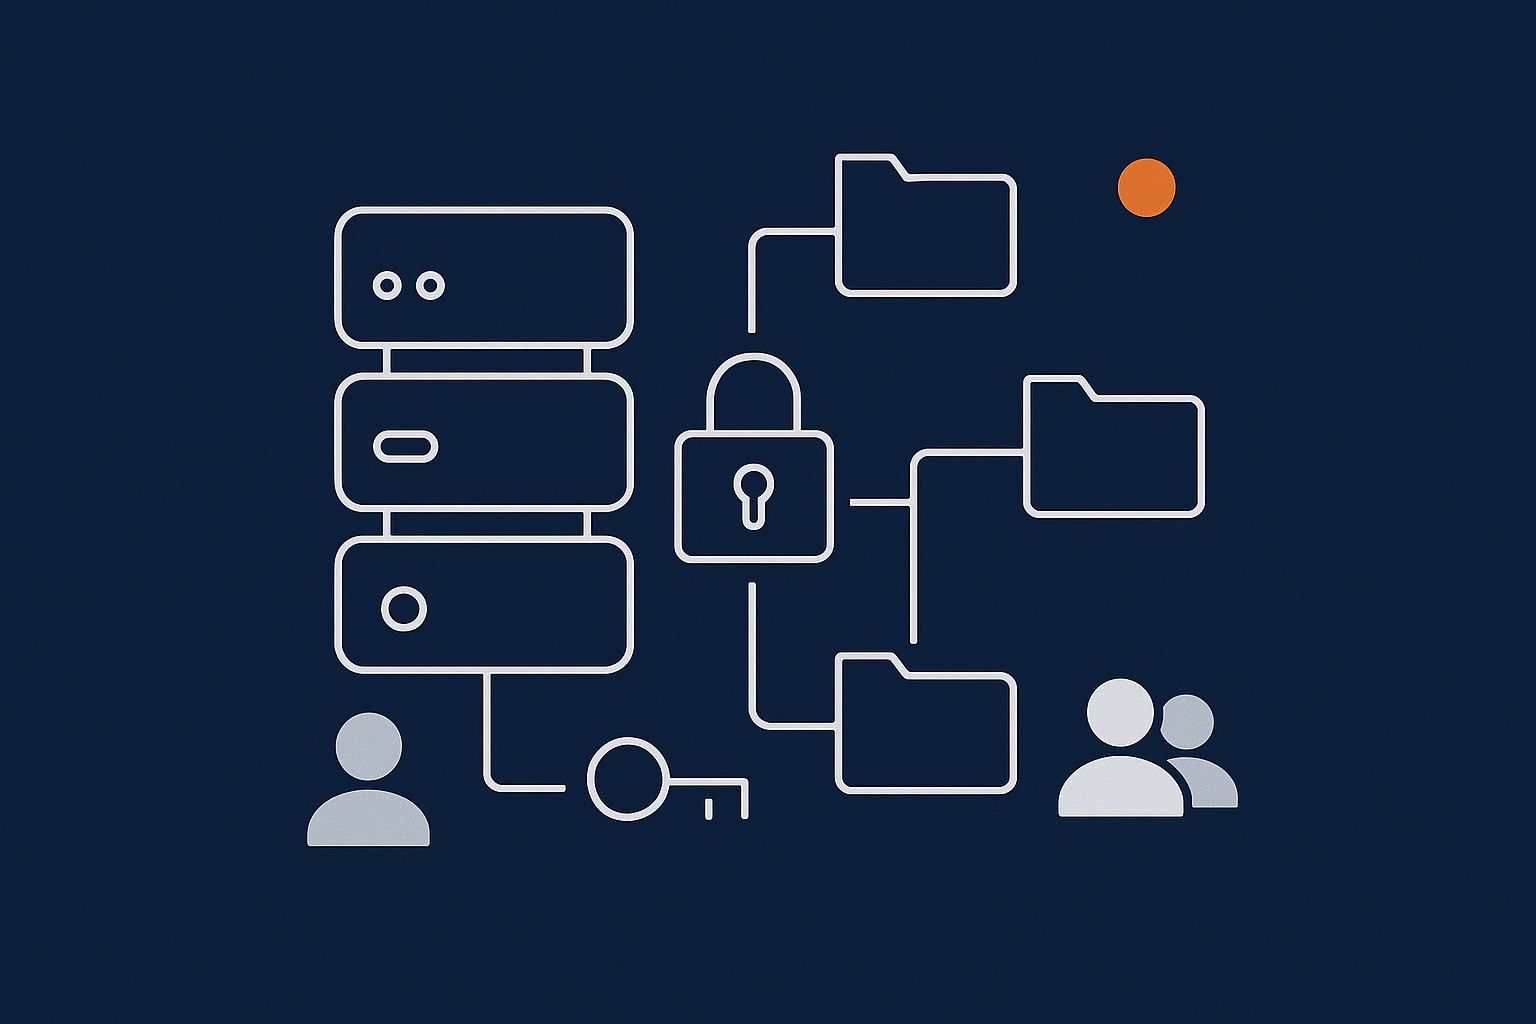
Quick Refresher: How Linux File Permissions and Ownership Work
Users, groups and the www-data account in plain English
On Linux, every file and directory has:
- An owning user (for example
alice). - An owning group (for example
www-dataoralice). - Permission bits for:
- the owner,
- members of the group,
- everyone else (often shown as “other” or “world”).
www-data is a normal Linux user and group that is often used by web servers such as Apache and Nginx. It is not special in itself. The important thing is that the processes handling web requests run as some user, and that user needs access to your site’s files.
Read, write and execute: what r, w, x actually mean for a website
The three basic permissions are:
- r (read) — can open or read the file. For a website, this is needed to:
- Serve static files like images, CSS and JavaScript.
- Load PHP code files.
- w (write) — can modify or delete the file. For a website, this is needed to:
- Upload media or write cache files.
- Update plugins, themes or WordPress core.
- x (execute) — behaves differently for files and directories:
- On files: can run it as a program or script (rarely needed for PHP code itself).
- On directories: can enter/traverse it. Without
x, you cannotcdinto it or list its contents.
In practice for a web root:
- Directories need
randxto be accessible. - Most code files need
rfor the web server and nowfor the public. - Only specific directories such as uploads or cache need
wfor the web server user.
Symbolic vs numeric modes (chmod 755, 644 etc)
Permissions can be described in two ways:
- Symbolic:
u=rwX,g=rX,o=rX(user, group, other). - Numeric:
755,644etc.
The numeric form is common for web roots:
755means:- User:
7= read + write + execute. - Group:
5= read + execute. - Other:
5= read + execute.
- User:
644means:- User:
6= read + write. - Group:
4= read. - Other:
4= read.
- User:
Typical pattern for PHP sites:
- Directories:
755. - Files:
644.
Viewing current permissions safely
Before changing anything, it is wise to inspect what you have now. You can do this without any risk.
cd /var/www
ls -l
This lists files with permissions, owner and group. You might see output like:
-rw-r--r-- 1 alice www-data  1234 Dec 13 10:00 index.php
drwxr-xr-x 5 alice www-data  4096 Dec 13 09:50 wp-content
Here you can read that:
index.phpis owned byaliceand groupwww-data, permissions644.wp-contentis a directory (dat the start), owned byalice:www-data, permissions755.
To see details for a single file:
stat index.php
stat shows same information in a more verbose form. These commands are read only and safe to use on any environment.
Understanding www-data and the Web Server User
What www-data is on Apache, Nginx and PHP-FPM
The name www-data is a convention, not a requirement. On Debian and Ubuntu, Apache, Nginx and PHP-FPM often run as www-data. On CentOS, AlmaLinux or Rocky Linux, they may run as apache or nginx instead.
Roughly:
- Apache on Debian/Ubuntu: user
www-data, groupwww-data. - Apache on CentOS type systems: user
apache, groupapache. - Nginx: often user
www-dataornginx. - PHP-FPM: usually configured per pool, often
www-dataor a site specific user.
Why web server processes should not run as root
Web server processes handle untrusted input from the internet. If they ran as root, any flaw in your application or the web server could modify system files. Running them as a restricted user such as www-data means:
- They can read and write only what they need to serve your sites.
- They cannot directly change system configuration or other users’ data.
This is one of the most important layers of protection on a Linux web server.
Finding the user and group your web stack actually uses
It is best not to guess which user your web server uses. You can check directly.
On Nginx, run:
ps aux | grep nginx | grep -v grep
Look for lines like:
www-data 1234 0.0 ... nginx: worker process
On Apache (using apache2 service name):
ps aux | grep apache | grep -v grep
For PHP-FPM, check its configuration, for example on Debian/Ubuntu:
grep -E '^(user|group)' /etc/php/*/fpm/pool.d/*.conf
This should show lines like:
user = www-data
group = www-data
Keep a note of the user and group you actually see. They are the ones that must be able to read your code and write to designated directories.
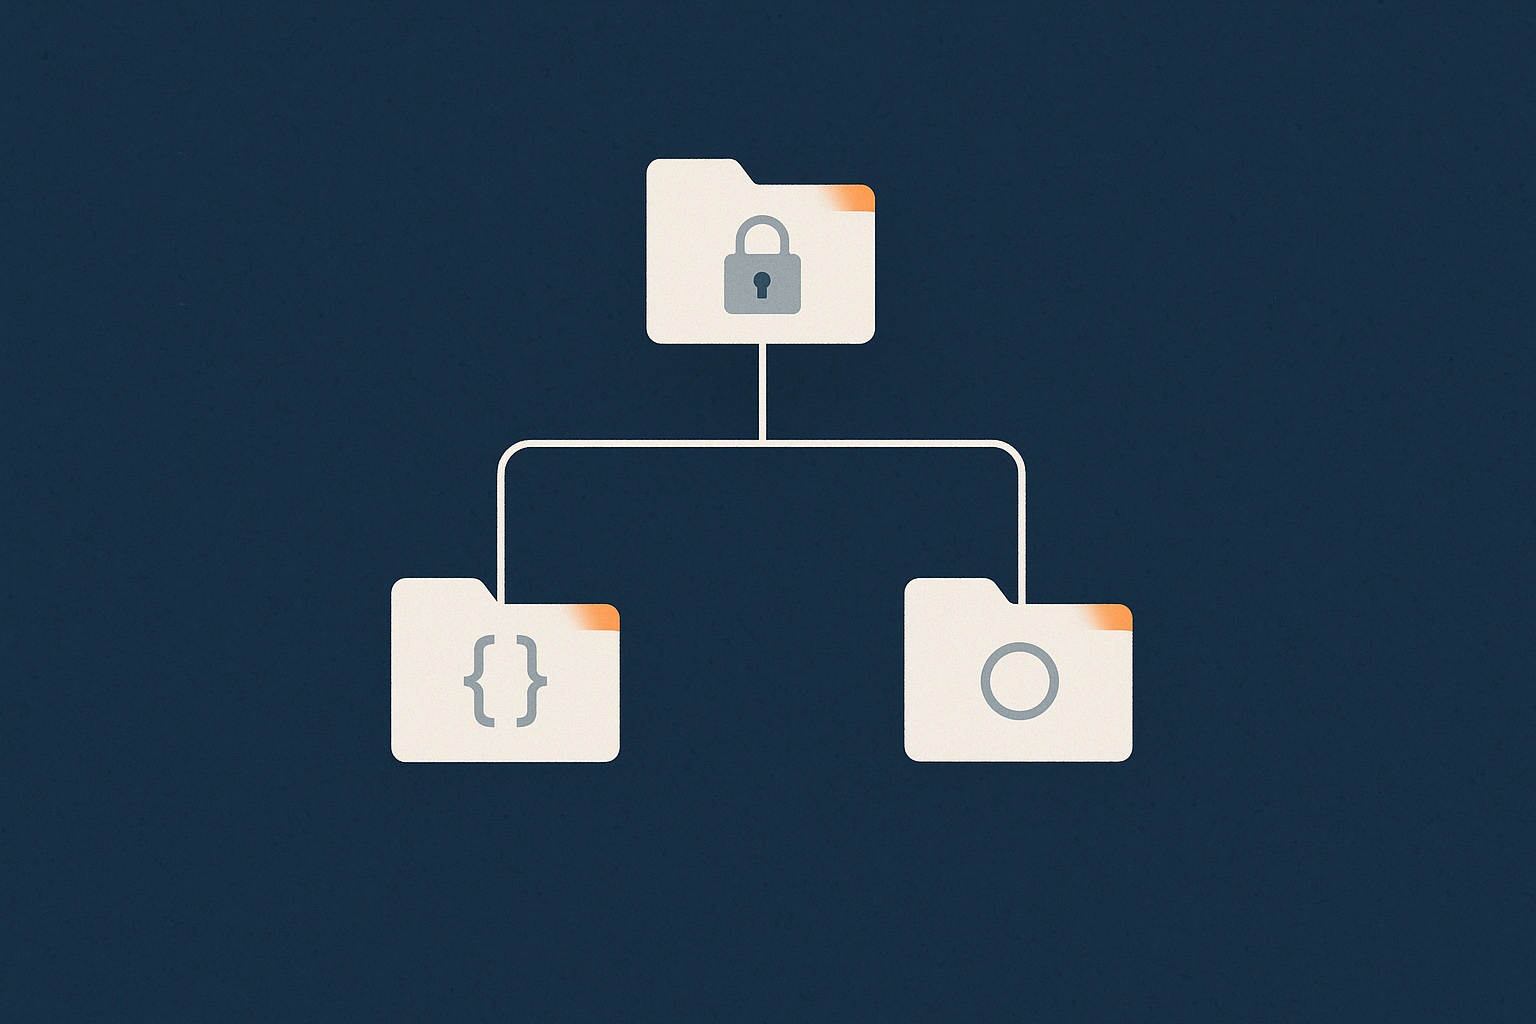
Safe Default Permissions for a Typical Web Root
Typical layout for /var/www or /home/user/public_html
Common layouts include:
/var/www/example.com/publicor/var/www/htmlfor Apache/Nginx./home/youruser/public_htmlor/home/youruser/sites/example.comin shared style setups.
Within a WordPress site you might see:
wp-admin,wp-includes,wp-content.- Within
wp-content:plugins,themes,uploadsand sometimescache.
The permissions and ownership of these directories are what decide whether updates, uploads and caching work smoothly.
Safe baseline for WordPress and PHP apps (files vs directories)
A widely used, safe baseline for most PHP applications is:
- Directories:
755. - Files:
644.
For WordPress, this is normally enough to:
- Allow the web server to read all core, theme and plugin files.
- Allow the owner (your SSH user) to edit code.
- Prevent the world from writing to code files.
Writeable directories such as wp-content/uploads may use 775 or 755 depending on your ownership pattern, which we will cover shortly.
Setting safe defaults with find and chmod (and how not to break SSH)
Sometimes you inherit a site with messy permissions. You may want to reset them under the web root. The find command is the usual approach, but it should be used carefully and only inside the intended directory.
Important: Never run these examples on / or your home directory. Always move into the web root first and double check with pwd.
cd /var/www/example.com/public
pwd
Confirm that pwd prints the correct path.
To set directory permissions to 755 safely:
find . -type d -exec chmod 755 {} \;
This finds all directories under the current directory (.) and applies chmod 755 to each. It does not touch files. If you mis-run this at the wrong level, you can remove execute bits from important system directories and cause login problems, which is why checking pwd first is so important.
To set file permissions to 644:
find . -type f -exec chmod 644 {} \;
This affects only files, not directories.
If something goes wrong, you can re-run the commands with different modes, but there is no universal “undo”. For that reason, it is wise to:
- Take a backup or snapshot of the VPS first.
- Test the commands on a staging copy of the site.
- Record the commands used in a change log for future reference.
To avoid touching your SSH keys, do not run recursive chmod from your home directory. Your ~/.ssh directory should usually have stricter permissions than a web root. If you suspect you have broken SSH key permissions, you can refer to a guide such as Securing SSH on Your Linux Server for repair steps.
Special writeable directories: uploads, cache, sessions
Most of your code should be read only to the web server. The exceptions are:
- Uploads: user generated content such as images, PDFs, product downloads.
- Cache: application or plugin caches (for example
wp-content/cache). - Sessions: sometimes stored on disk rather than in Redis or the database.
The web server user (often www-data) needs write access to these. A common pattern in a simple single user setup is:
- Site owned by your SSH user, group set to
www-data. - Uploads and cache directories have group write permission.
We will come back to the ownership pattern in the next section.
Common mistakes: 777, recursive chown and mixing system and user homes
Some frequent pitfalls:
chmod -R 777: this gives everyone write access to everything under the path, including PHP files. It often masks the real issue temporarily and can make exploitation easier. It is rarely justified.- Recursive
chownon the wrong path: commands such assudo chown -R youruser:youruser /can break large parts of the system. Always check the path carefully and usepwdbefore pasting recursive commands. - Mixing system files and user homes: avoid putting web roots directly under
/rootor mixing them into system directories. Keep them under/var/wwwor under a dedicated user’s home for clarity.
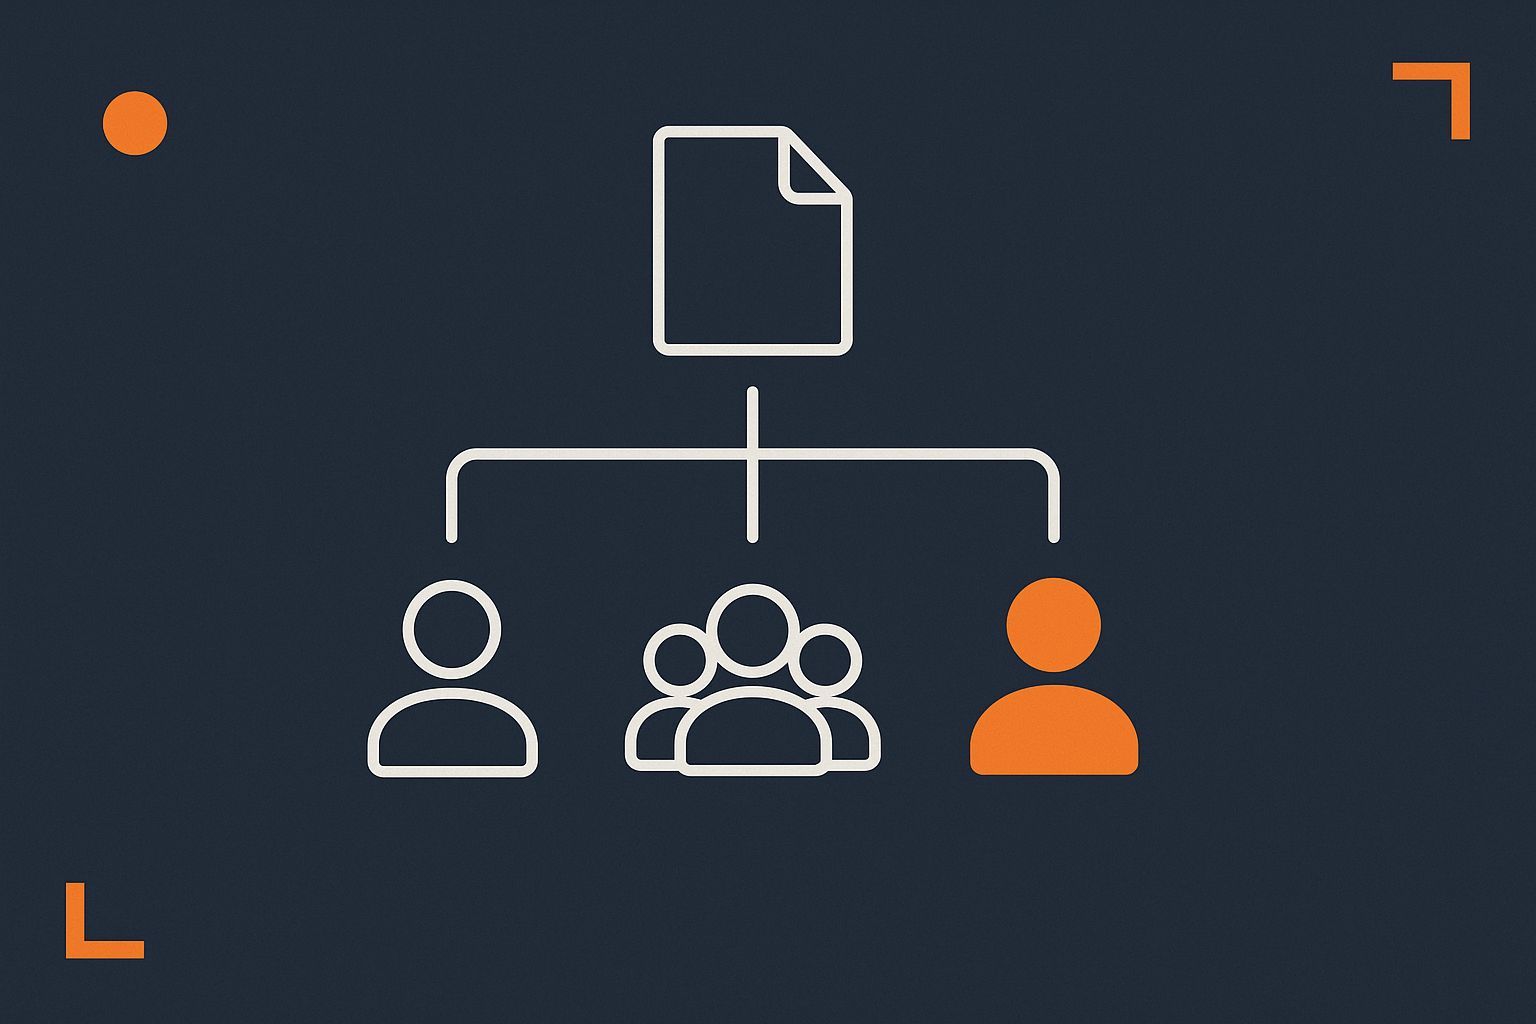
Ownership, Deployments and Who Should Own Your Code
The three key actors: your SSH user, www-data and any deploy user
On a typical VPS used for websites, you will encounter:
- Your SSH user: the account you log in as to edit files and run commands.
- The web server user (
www-data,nginxorapache): the account that reads PHP files and writes to uploads or cache. - A deploy user (optional): used by CI tools (for example GitLab CI, GitHub Actions) or by your team to pull from Git.
Good ownership patterns treat these as distinct roles, even if sometimes one user plays more than one role.
Simple single-user setup: site owned by your SSH user, group www-data
If you are the only person deploying changes, a simple pattern is:
- Owner: your SSH user.
- Group:
www-data. - Permissions:
- Directories:
775. - Files:
664.
- Directories:
This gives:
- You (the owner) read and write access to everything under the site.
www-data(as a group member) read access everywhere, and write access where needed (uploads, cache) if you choose to loosen just those paths.
To apply this pattern to an existing site safely, from the site root:
cd /var/www/example.com/public

# Set owner to youruser and group to www-data, without recursing into other sites
sudo chown -R youruser:www-data .
This assumes that everything under the current directory belongs to this site. Take care if sibling directories host other projects.
Then set sensible permissions:
find . -type d -exec chmod 775 {} \;
find . -type f -exec chmod 664 {} \;

# Tighten code directories if you like:
chmod -R 755 wp-admin wp-includes
You might choose to keep uploads world readable but not world writable:
chmod -R 775 wp-content/uploads
If WordPress auto updates still cannot write where needed, check file ownership on those directories with ls -ld and adjust group or permissions rather than using 777.
Safer multi-user or agency setup: dedicated user per site
If you manage several clients or work in a team, it can help to:
- Create a dedicated Linux user per site (for example
site_example). - Set the web root under that user’s home or under
/var/www/site_example. - Give your developers SSH access as that user or via group membership.
Pattern:
- Owner: site specific user (for example
site_example). - Group: site specific group, optionally also used by developers.
- Web server user (
www-data) either:- has group membership for the site group, or
- is given read access via “other” permissions.
This keeps each site naturally isolated. If one site misbehaves, it is less likely to affect others.
Using groups instead of giving www-data full ownership
A common mistake is to run:
sudo chown -R www-data:www-data /var/www/example.com
This makes www-data the owner of all files and directories. While it will typically solve write problems, it has some downsides:
- It can make it harder for you to edit files without
sudo. - If there is a vulnerability in your application, the web server user owning everything gives it broad write access.
A more balanced approach is:
- Owner: a human or deploy user.
- Group:
www-data. - Permissions adjusted so the group has enough rights in writeable directories.
You can change only the group with chgrp:
sudo chgrp -R www-data /var/www/example.com/public
This leaves the owner intact but sets the group as www-data recursively.
Applying ownership with chown and chgrp without clobbering everything
It is easy to accidentally alter ownership of too much. To stay safe:
- Use relative paths where possible, after changing into the site directory.
- Run
ls -ldon the directories you plan to modify, to see current ownership. - Prefer more targeted commands, for example applying
chownonly towp-contentif that is where the issue is.
Examples:
cd /var/www/example.com/public

# Only adjust wp-content (upload and cache area)
sudo chown -R youruser:www-data wp-content
If you discover that some files inside are wrongly owned by root because of past sudo use, you can correct just those:
# Find files owned by root inside wp-content and reassign them
sudo find wp-content -user root -exec chown youruser:www-data {} \;
This leaves everything else as it is, which is usually safer than a broad recursive change.
Using sudo Safely When Working on Web Roots
What sudo actually does (and why it is dangerous in the web root)
sudo runs a command with elevated privileges, typically as root. It is essential for tasks such as:
- Installing system packages.
- Changing ownership and permissions on files you do not own.
- Managing system services (such as
systemctl restart nginx).
In the web root, careless use of sudo can cause:
- New files created as
root, which your normal user cannot edit later. - Accidental recursive operations affecting many more files than intended.
The aim is not to avoid sudo entirely, but to use it sparingly and intentionally.
Avoiding root-owned files created by accident
A common pattern is editing files like this:
sudo nano index.php
If index.php did not already exist, it will be created as owned by root. Later, when you try to edit or deploy without sudo, you find you cannot save changes.
Safer habits:
- Use your normal user to edit files you already own. That is, avoid
sudofor everyday editing under the web root. - If a file truly needs to be edited by root (for example,
/etc/nginx/nginx.conf), keep that separate from your application code.
If you already have root owned files in your web root, you can fix them with a careful chown as shown earlier.
Practical patterns: when to use sudo, when not to
Reasonable patterns:
- Use
sudowhen:- Installing or upgrading packages (
sudo apt update,sudo apt install). - Editing system configuration under
/etc. - Changing ownership of files you do not own (
sudo chownin the web root). - Managing services (
sudo systemctl restart php-fpm).
- Installing or upgrading packages (
- Avoid
sudowhen:- Working on application code that should be owned by your user.
- Running tools like
composer,npmor deployment scripts in your web root. These should run as the deploy or SSH user, not root.
If you find yourself typing sudo in front of every command in your web root, it is a sign that ownership is not set up correctly.
Using sudo -u www-data for testing and maintenance tasks
Sometimes you want to run a command as www-data to see what it can actually access. For example, to test whether it can write to a directory.
You can use:
sudo -u www-data touch /var/www/example.com/public/wp-content/uploads/test.txt
If this command succeeds, www-data can write there. If it fails with “permission denied”, your ownership or permissions need adjustment.
You can also start a shell as www-data for troubleshooting:
sudo -u www-data -s
Use this only for short sessions, and be aware that you will not have a normal login shell or environment. Type exit to return to your user.
Practical Deployment Patterns and Permissions
Manual SFTP / SSH uploads from your laptop
When you upload files manually via SFTP or SCP, they will usually be owned by the user you authenticate as. For a simple single user setup, that is fine, as long as:
- That user is the owner of the web root.
- The group is set to
www-dataand permissions give the group read access.
If you notice that newly uploaded files have the wrong group, you can fix them in bulk:
cd /var/www/example.com/public
sudo chgrp -R www-data .
Then apply your preferred permissions again if needed.
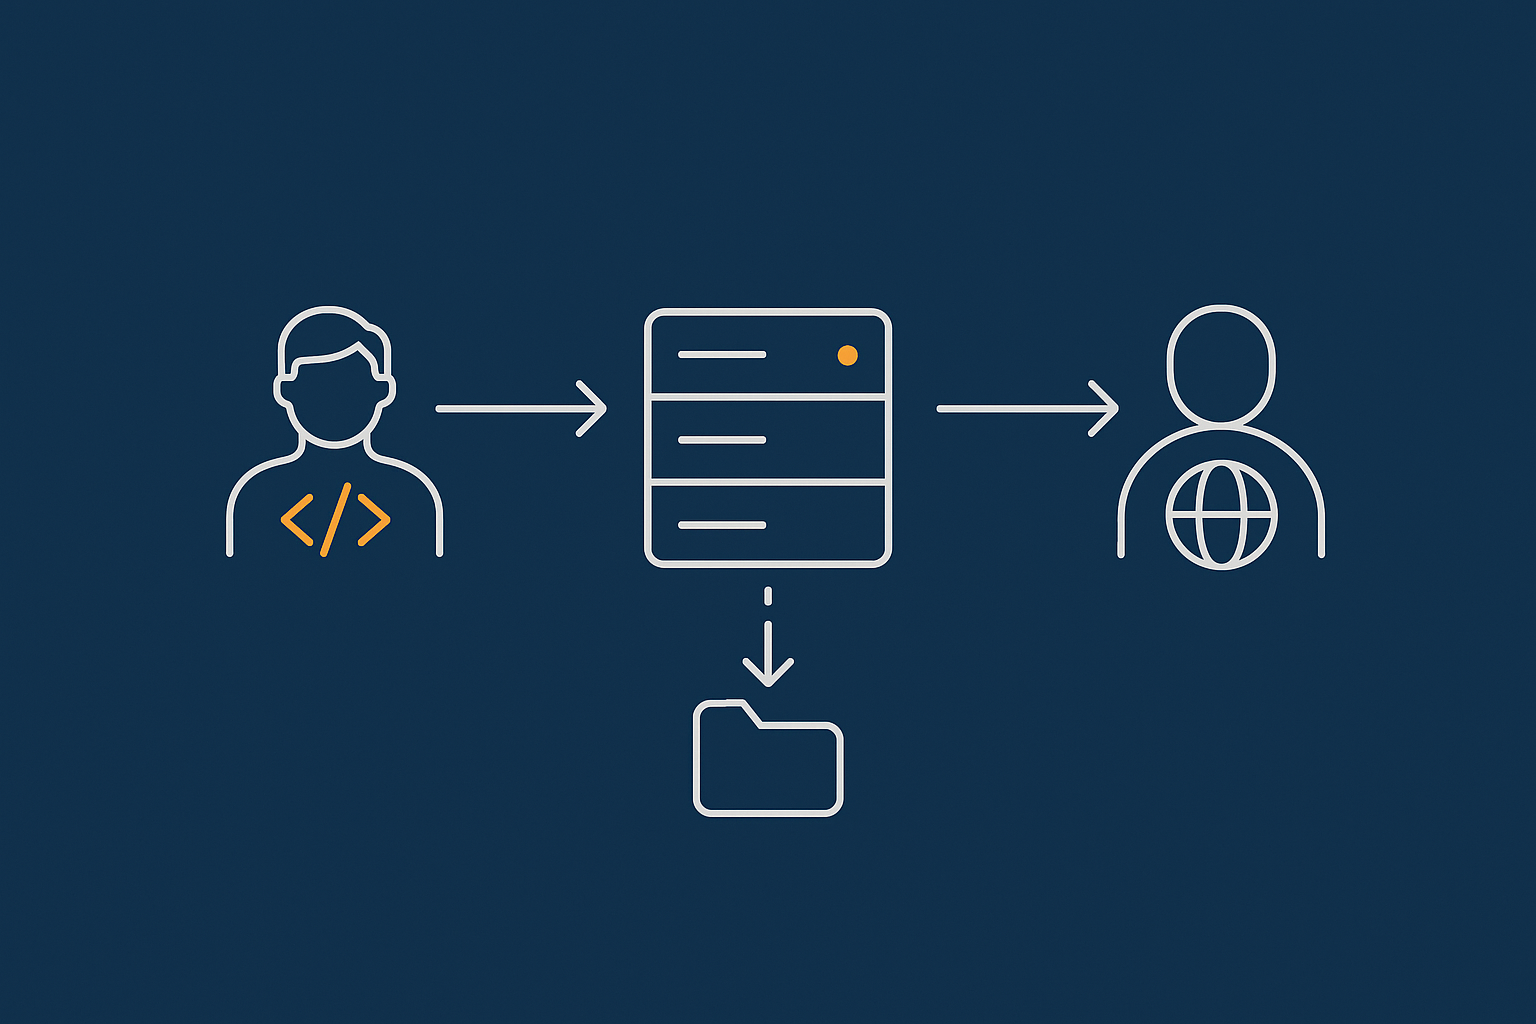
Git-based deployments with a deploy user
For more repeatable deployments, many teams use a dedicated deploy user and Git:
- Create a user such as
deployorsite_example. - Give it SSH keys and restricted sudo if needed.
- Configure your CI/CD tool to connect as that user and run
git pullor similar in the web root.
Ownership pattern:
- Owner: deploy user.
- Group:
www-dataor a site specific group thatwww-datacan read. - Permissions:
775for directories,664for files, with uploads and cache directories slightly more permissive if needed.
When using a deploy user, try to keep human editing and deployment both going through that account or through Git. This reduces the chance of conflicting ownership.
Permissions considerations for WordPress auto-updates and plugin installs
WordPress auto-updates and plugin install features rely on the web server user being able to:
- Write temporary files.
- Replace plugin or theme directories.
- Write to
wp-contentand specificallywp-content/pluginsandwp-content/themes.
If these fail, you may see prompts asking for FTP credentials, or updates that silently do nothing.
Ways to support auto-updates safely:
- Ensure
wp-contentand subdirectories are group owned bywww-data(or by a group that includeswww-data). - Give the group write permission where appropriate, for example:
cd /var/www/example.com/public
sudo chgrp -R www-data wp-content
sudo find wp-content -type d -exec chmod 775 {} \;
sudo find wp-content -type f -exec chmod 664 {} \;
If you prefer not to grant wide write access for compliance or security reasons, you can disable auto-updates and perform updates via Git or through a controlled deployment process instead. Managed environments, such as G7Cloud Managed WordPress hosting, often provide an update workflow that handles these details.
Staging vs production: keeping ownership consistent across environments
It is common to have both staging and production environments. To avoid surprises:
- Use the same ownership and permission pattern in both places.
- Use the same web server user (
www-dataor similar) in both if possible. - When cloning from production to staging, re-run your
chownandchmodscripts to normalise everything.
Consistency makes debugging much simpler. If something works on staging but fails on production, you can compare permissions and ownership directly with ls -l and stat on both servers.
Diagnosing and Fixing Common Permission Problems
Symptoms to recognise: 403, 404, 500 and failed uploads
Permissions issues often present as HTTP errors:
- 403 Forbidden: web server is not allowed to read the file or traverse the directory.
- 404 Not Found: sometimes really missing, but can also mean the server process cannot see the file due to permissions.
- 500 Internal Server Error: PHP errors caused by “permission denied” when writing caches, logs or uploads.
- File upload forms that hang or return a generic failure message.
WordPress may show messages like “Unable to create directory wp-content/uploads/…” which almost always points to ownership or write permissions.
Step-by-step checks with ls, stat and test files
A simple troubleshooting checklist:
- Check the directory and file permissions:
cd /var/www/example.com/public ls -ld . ls -ld wp-content wp-content/uploads ls -l wp-content/uploads | head - Check the owner and group:
stat wp-content/uploads - Test write access as
www-data:sudo -u www-data touch wp-content/uploads/test.txt
If that last command fails with “permission denied”, you know that www-data cannot write there. Adjust ownership and permissions as described earlier, then remove the test file:
rm wp-content/uploads/test.txt
Safe way to repair a broken WordPress tree (without 777)
If you have inherited a WordPress install full of mixed owners and incorrect modes, you can reset it carefully.
Before you begin:
- Take a filesystem backup or a VPS snapshot.
- Note your SSH user and the web server user (for example
www-data).
From the web root:
cd /var/www/example.com/public

# 1. Assign owner and group
sudo chown -R youruser:www-data .

# 2. Directories 755, files 644
find . -type d -exec chmod 755 {} \;
find . -type f -exec chmod 644 {} \;

# 3. Make wp-content more flexible
sudo chgrp -R www-data wp-content
sudo find wp-content -type d -exec chmod 775 {} \;
sudo find wp-content -type f -exec chmod 664 {} \;
This should be enough for most single site setups where you are comfortable with WordPress auto-updates. You can then tighten specific directories (for example, wp-includes) if you want them to be less writable.
When the problem is SELinux, AppArmor or a security module instead
Not all “permission denied” issues come from Unix permissions.
- SELinux on CentOS type systems can block access even if the permissions look correct.
- AppArmor on Ubuntu can do the same.
- Web application firewalls or modules such as
mod_securityor custom Nginx rules can also interfere.
Clues that SELinux might be involved:
- Permissions and ownership look correct.
- Web server logs mention
permission deniedwith SELinux context information.
You can inspect and manage SELinux contexts using tools like ls -Z and chcon. The official Red Hat SELinux documentation (Using SELinux) provides a good overview.
If SELinux or AppArmor is new to you, consider testing changes on a staging server first, or discuss with your hosting provider. On G7Cloud managed virtual dedicated servers, these layers are configured for you so you can focus more on the application itself.
When to Hand Permissions and Ownership to Managed Hosting
Signs you are spending too long firefighting chmod and chown
Permissions are a normal part of server administration. They become a problem when they dominate your time. Some signs:
- You keep a window open with
chmodandchowncheatsheets. - Each WordPress update leads to trial and error with permissions.
- Developers and content editors frequently encounter upload or update failures.
- You are reluctant to change anything because previous fixes felt fragile.
At that point, it can be worth considering a managed environment where someone else is responsible for the underlying user and permission model.
What a managed VDS or managed WordPress host typically handles for you
A managed virtual dedicated server or managed WordPress hosting plan will usually:
- Set up a sensible default web stack with appropriate users and groups.
- Configure file permissions and automation for backups and updates.
- Handle OS and stack updates, keeping PHP, the web server and database patched.
- Monitor resource usage and advise when to scale.
With managed WordPress hosting in particular, you can expect:
- File and directory permissions tuned specifically for WordPress and WooCommerce.
- Support for safe updates and rollbacks.
- Optional staging environments that mirror production closely.
This can be a good fit if your priority is running one or two business sites reliably, rather than investing time in server administration skills.
How this fits with security, PCI and multi-site setups
More complex setups, such as:
- WooCommerce stores handling card data.
- Multi-tenant WordPress multisite networks.
- Applications subject to PCI or similar standards.
often have stricter requirements around who can write where, and how file integrity is monitored.
A managed environment with PCI conscious hosting can provide guidance and configurations that align with those requirements, including separation of duties between application owners, web server processes and operations staff.
Next Steps and Further Reading
Related G7Cloud guides worth reading next
If you would like to deepen your understanding, these guides build on what you have just read:
- Understanding Linux File Permissions and Ownership on a Web Server for a slower walk through the basics.
- First 48 Hours on a New Linux VPS for setting up users, SSH and security from the start.
- Safe WordPress Deployments on Managed Hosting if you are moving towards structured deployments.
If you find yourself spending more time on chmod and chown than on your actual sites, it may be worth exploring G7Cloud virtual dedicated servers and Managed WordPress hosting. They can provide a solid base of permissions and ownership so that your attention can stay on your applications and content.