SSH Access for Beginners: Safe First Login and Day‑to‑Day Use on Your VPS
Who This SSH Guide Is For (And What You Will Be Able To Do)
This guide is written for people who are comfortable with websites and basic hosting, but new to Linux servers and the command line. You might have just moved from shared hosting to a VPS, upgraded to a virtual dedicated server, or started managing sites for clients.
Typical scenarios: from shared hosting to your own VPS
If any of these sound familiar, you are in the right place:
- You have run WordPress sites on shared hosting and have just ordered a VPS.
- Your developer or agency has given you SSH details and you are not sure what to do with them.
- You are moving an existing business site or WooCommerce shop to a more powerful server.
- You want to understand SSH better before touching a live production system.
Running your own VPS or managed and unmanaged virtual dedicated servers gives you flexibility and performance, but also more responsibility. SSH is the main way you will work with that server directly.
If you want a broader picture of VPS vs dedicated hosting and what you are taking on, the article Linux Hosting Explained for Small Businesses: VPS vs Dedicated Server is a useful companion.
What you will learn, step by step
This guide is practical and gradual. By the end you will be able to do the following safely.
Make your first SSH login using password authentication
You will learn how to connect from macOS, Linux and Windows, what the initial warnings mean, and how to confirm who you have logged in as.
Set up SSH keys and disable password logins
You will generate an SSH key pair on your own computer, install the public key on the server, and optionally turn off password logins once you are comfortable.
Use a few core commands without breaking your server
You will practise basic navigation, viewing logs and editing text files. Where a command can cause damage if misused, this is clearly highlighted.
Know when you should ask for managed help instead
You will also get a sense of which tasks are perfectly reasonable for a careful beginner, and which are better handled by a managed VDS or managed WordPress hosting, especially for busy shops and critical sites.
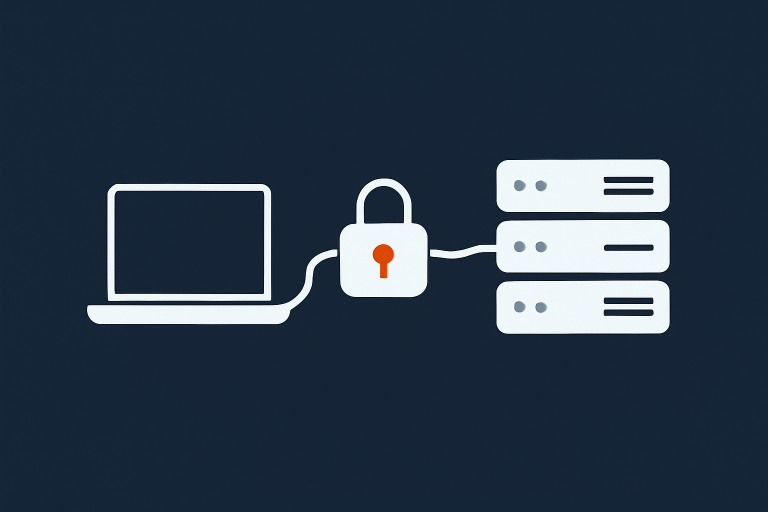
What SSH Actually Is, In Plain Language
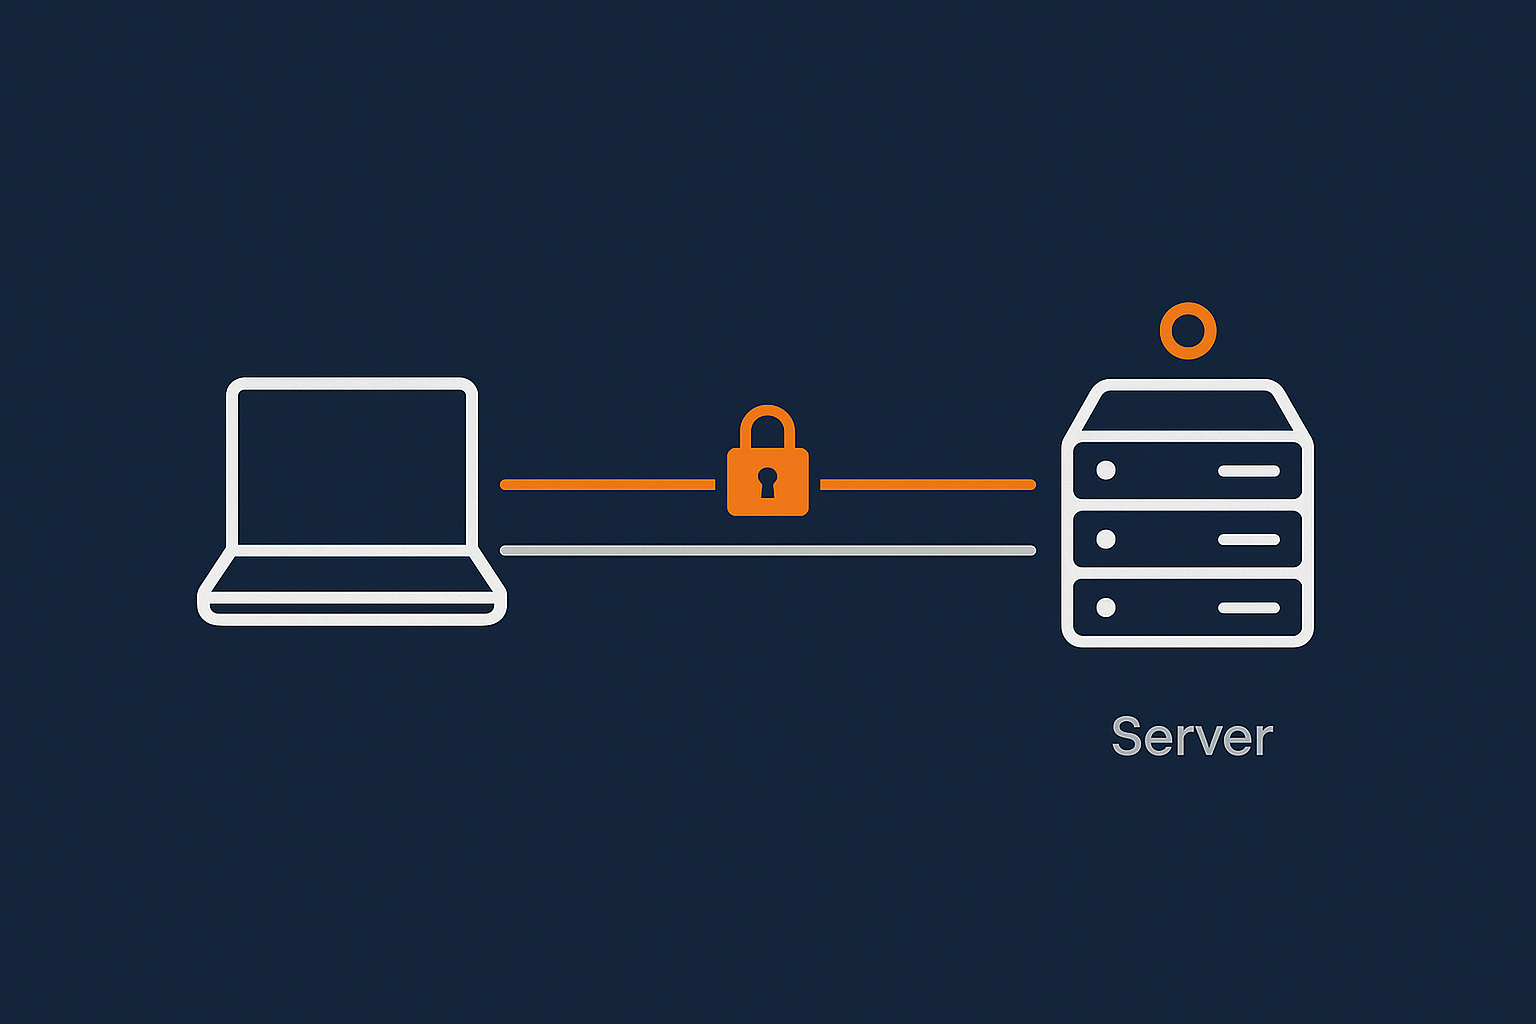
SSH in one sentence
SSH is a secure way to open a command line session on your server over the network, so you can type commands as if you were sitting in front of it.
It encrypts everything between your computer and the server, which is why it is the standard way to manage Linux servers over the internet.
How SSH fits into your hosting stack
Where SSH sits alongside web server, PHP and database
Your hosting stack typically looks like this:
- Visitors connect to your website over HTTP or HTTPS.
- The web server (for example Nginx or Apache) handles those requests.
- PHP (for example PHP‑FPM) runs your WordPress or WooCommerce code.
- A database server (usually MySQL or MariaDB) stores your data.
- SSH is for you, the administrator, to log in securely and manage the system itself.
SSH does not serve web pages. Instead it lets you:
- Inspect logs when a site is slow.
- Update software packages.
- Change configuration files.
- Restart services if needed.
Why SSH access is more powerful than a control panel
Control panels such as cPanel, Plesk or custom dashboards are useful, but they usually expose a subset of what the server can do.
SSH lets you:
- Run any command that your user is allowed to run.
- Use advanced tools that are not available in a web interface.
- Automate tasks with scripts.
This power is helpful, but it also means mistakes can have wider impact. You will see safe habits throughout this guide so you can use SSH confidently without rushing.
Common SSH terms explained
Client, server, port and user
- SSH client
The program you use on your computer to connect, for example thesshcommand, PuTTY or Windows Terminal. - SSH server
The SSH service running on your VPS or dedicated server, usually thesshddaemon. - Port
A number that identifies which service you are connecting to. SSH listens on port 22 by default, though it can be changed. - User
The Linux account you log in as, for examplerootorubuntuoradmin.
Password vs key‑based login
- Password login
You type a password when you connect. Simple, but easier to guess or brute force if not configured carefully. - Key‑based login
You generate a key pair on your computer, keep the private key, and copy the public key to the server. The server then recognises you based on that key. This is both more convenient and more secure once set up.
This guide starts with passwords, then moves you to keys, so you understand both.
Before You Log In: Information You Need From Your Host
Before you open a terminal, it helps to gather a small set of details. This avoids trial and error and makes troubleshooting easier.
Essential SSH connection details
Server hostname or IP address
You will need either:
- The server IP address, for example
203.0.113.10, or - A hostname that points to it, for example
server1.example.com.
Your hosting control panel or welcome email usually provides this. If you are unsure, check with your provider.
Username and initial password
Typical initial users:
rooton many distributions.ubuntu,debianor similar on cloud images.
The initial password might be:
- Set by you in the control panel, or
- Generated and sent to you once.
Plan to change it immediately after your first login.
Port number and firewall access
Unless your host says otherwise, SSH will be on port 22. Some providers change this as part of their default hardening.
You also need to know whether any firewall is in place between you and the server, such as:
- A cloud provider security group.
ufworfirewallddirectly on the server.
If you cannot connect later, firewall rules are one of the first things to check. The separate guide Basic Linux Firewall Setup for VPS and Dedicated Servers explains this in more depth.
Checking your firewall or security group allows SSH
Very quick ufw / firewalld check (without changing rules)
If you already have console access or a control panel terminal, you can check which firewall tool is active.
Check UFW status:
sudo ufw status verbose
This command asks ufw, the Uncomplicated Firewall, to print its current rules. You might see:
Status: active

To                         Action      From
--                         ------      ----
22/tcp                     ALLOW       Anywhere
If you see port 22 (or your custom SSH port) allowed, SSH should be reachable from allowed locations. If you see Status: inactive, then UFW is not filtering traffic and something else (or nothing) is.
Check firewalld status:
sudo firewall-cmd --state
Typical outputs:
runningmeans firewalld is active.not runningmeans it is not currently filtering.
These checks do not change any firewall rules, so they are safe. Adjusting firewall rules needs more care, which is covered in the firewall article linked above.
Windows, macOS and Linux SSH clients
Using the built‑in terminal (macOS / Linux)
On macOS and most Linux desktops, the SSH client is installed by default. You open a terminal and use the ssh command.
- On macOS: open Terminal from Applications → Utilities.
- On Linux: open Terminal or your favourite terminal emulator.
Using PuTTY or Windows Terminal
On Windows you have a few options:
- Windows 10/11 built‑in OpenSSH
Recent versions include ansshcommand in PowerShell and Windows Terminal. - PuTTY
A widely used graphical SSH client. You enter your host, port and username in a window.
Using the native OpenSSH client on Windows is increasingly common, so this guide will refer to both methods.
Your First SSH Login: Step‑by‑Step
Connecting from macOS or Linux terminal
Basic ssh command syntax
The basic pattern is:
ssh username@server-address
For example, if your user is root and the server IP is 203.0.113.10:
ssh root@203.0.113.10
This tells your SSH client to connect to port 22 of 203.0.113.10 and log in as root.
If your server uses a non‑standard port, for example 2222, use:
ssh -p 2222 root@203.0.113.10
Example connection and what each part means
Suppose you run:
ssh ubuntu@server1.example.com
sshis the client program.ubuntuis the user account you will log in as.server1.example.comis the hostname of your VPS or VDS.
On first connection, SSH will ask you to confirm the server key fingerprint (more on that next), then prompt for the password for ubuntu. Type it and press Enter. Nothing will appear as you type, which is normal.
First‑time fingerprint warning: what to do
The first time you connect, you will see a message like:
The authenticity of host 'server1.example.com (203.0.113.10)' can't be established.
ED25519 key fingerprint is SHA256:...
Are you sure you want to continue connecting (yes/no/[fingerprint])?
This is your SSH client saying, “I have never seen this server before. Please confirm it is the one you expect.”
On a brand new server, it is usually safe to type yes and press Enter. Your client will remember this fingerprint in a file called ~/.ssh/known_hosts. Next time you connect, it will check that the key has not changed.
If you ever see a warning that the host key has changed unexpectedly, stop and investigate. It might simply be that the server was rebuilt, but it is worth double‑checking with your provider before continuing.
Connecting from Windows with PuTTY
Entering host, username and port
With PuTTY installed:
- Open PuTTY.
- In “Host Name (or IP address)”, enter the IP or hostname, for example
203.0.113.10. - Set “Port” to
22(or your custom port). - Ensure “Connection type” is set to SSH.
- Click “Open”.
On first connection, PuTTY will show a security alert about the server host key. This mirrors the fingerprint message on macOS/Linux.
Accepting the server key on first connection
The PuTTY security alert will ask if you trust this host. For a new server whose IP and details you recognise, click “Accept”. This stores the key so future connections can verify it.
PuTTY will then open a terminal window and prompt:
login as:
Type your username (for example root or ubuntu) and press Enter, then type the password when asked.
Safety checks as soon as you log in
Confirm who you are logged in as (root or normal user)
Once you are in, the first thing to check is who you are actually logged in as. Run:
whoami
This prints the username of your current session, for example:
root
or
ubuntu
Knowing which user you are using helps you avoid running powerful commands unintentionally as root.
Change the initial password to something strong
Using the default or initial password for long periods is poor practice. To change your current user’s password, run:
passwd
You will be asked for your current password, then a new one twice. Choose a strong password that is unique to this server.
What this does:
The passwd command updates the password hash stored for your user. It does not log you out and does not change any other settings. If you ever forget the new password and cannot log in with keys, you may need to use your provider’s console or support to reset it.
Why you should avoid using root for daily work
The root user can do anything on the system, including deleting critical files or misconfiguring services. There is no “are you sure” prompt beyond what the command itself provides.
A safer pattern is:
- Log in as a normal user.
- Use
sudoto run individual administrative commands when needed.
The next section walks you through creating such a user.
Setting Up a Safer Non‑Root User for SSH
This is one of the most important early steps. It reduces the impact of mistakes and is standard practice on managed systems as well.
Why working as root is risky
Because root can do anything, a simple typo can have wide consequences. For example, mixing up a path in a remove command can delete the wrong directory. As a regular user, many of these commands will simply be denied.
Separating day‑to‑day work from administrative tasks also helps you think more deliberately before making system‑wide changes.
Create a new user and give limited admin rights
Assume you are currently logged in as root. You can add a new user called adminuser like this.
adduser / useradd commands with explanation
On Debian/Ubuntu and many derivatives, use adduser (friendlier). On CentOS/Rocky/Alma, useradd is more common.
Debian/Ubuntu:
adduser adminuser
This will:
- Create the user
adminuser. - Create a home directory, for example
/home/adminuser. - Prompt you to set a password and some optional details.
RHEL/CentOS‑style systems:
useradd -m adminuser
passwd adminuser
The -m flag tells useradd to create a home directory. Then passwd sets the user’s password.
Adding the user to the sudo group
To allow adminuser to run administrative commands with sudo, add them to the appropriate group.
On Debian/Ubuntu:
usermod -aG sudo adminuser
On RHEL/CentOS/Rocky/Alma:
usermod -aG wheel adminuser
What this does:
usermodchanges user properties.-aGappends the user to the named group without removing existing groups.sudoorwheelis the group that has sudo privileges by default.
This does not log anyone out. It simply adjusts group membership for new sessions.
Testing sudo without locking yourself out
Before you disable root logins, test that adminuser can log in and use sudo.
- From your current session, switch user:
su - adminuser - Check your identity:
whoamiIt should show
adminuser. - Test sudo with a harmless command:
sudo whoami
You should see:
root
and be prompted for adminuser’s password. This confirms sudo is working.
Disable direct root SSH logins once you are ready
This step is a useful hardening measure, but you should only do it after confirming your new user can log in and use sudo.
Editing sshd_config safely with a backup
The SSH server configuration file is usually /etc/ssh/sshd_config. Editing it incorrectly can prevent SSH logins, so take care.
First, make a backup:
sudo cp /etc/ssh/sshd_config /etc/ssh/sshd_config.backup
This copies the current configuration to a backup file. If something goes wrong, you can restore it with:
sudo cp /etc/ssh/sshd_config.backup /etc/ssh/sshd_config
Then, edit the file:
sudo nano /etc/ssh/sshd_config
Look for a line like:
#PermitRootLogin yes
Change it to:
PermitRootLogin no
Remove the # if present, so the line is active. In nano, press Ctrl + O to save, Enter to confirm, then Ctrl + X to exit.
Restarting SSH without cutting off your current session
Important:
Keep your current SSH session open while you test the new configuration. If something is misconfigured, you will still have that original root session to fix it.
To reload or restart the SSH service:
sudo systemctl restart ssh
On some systems the service is called sshd instead:
sudo systemctl restart sshd
Now, open a new terminal window on your computer and try to log in as adminuser. Root logins should now be rejected, but your non‑root user should work.
SAFETY NOTE: Always keep one existing session open while testing
This habit is very useful whenever you change SSH settings or firewall rules:
- Keep your original session open.
- Test new settings from a second session.
- If the new session works, you can close the old one.
This gives you a way back in if something unexpectedly blocks logins.
SSH Keys for Beginners: Logging In Without Typing Passwords
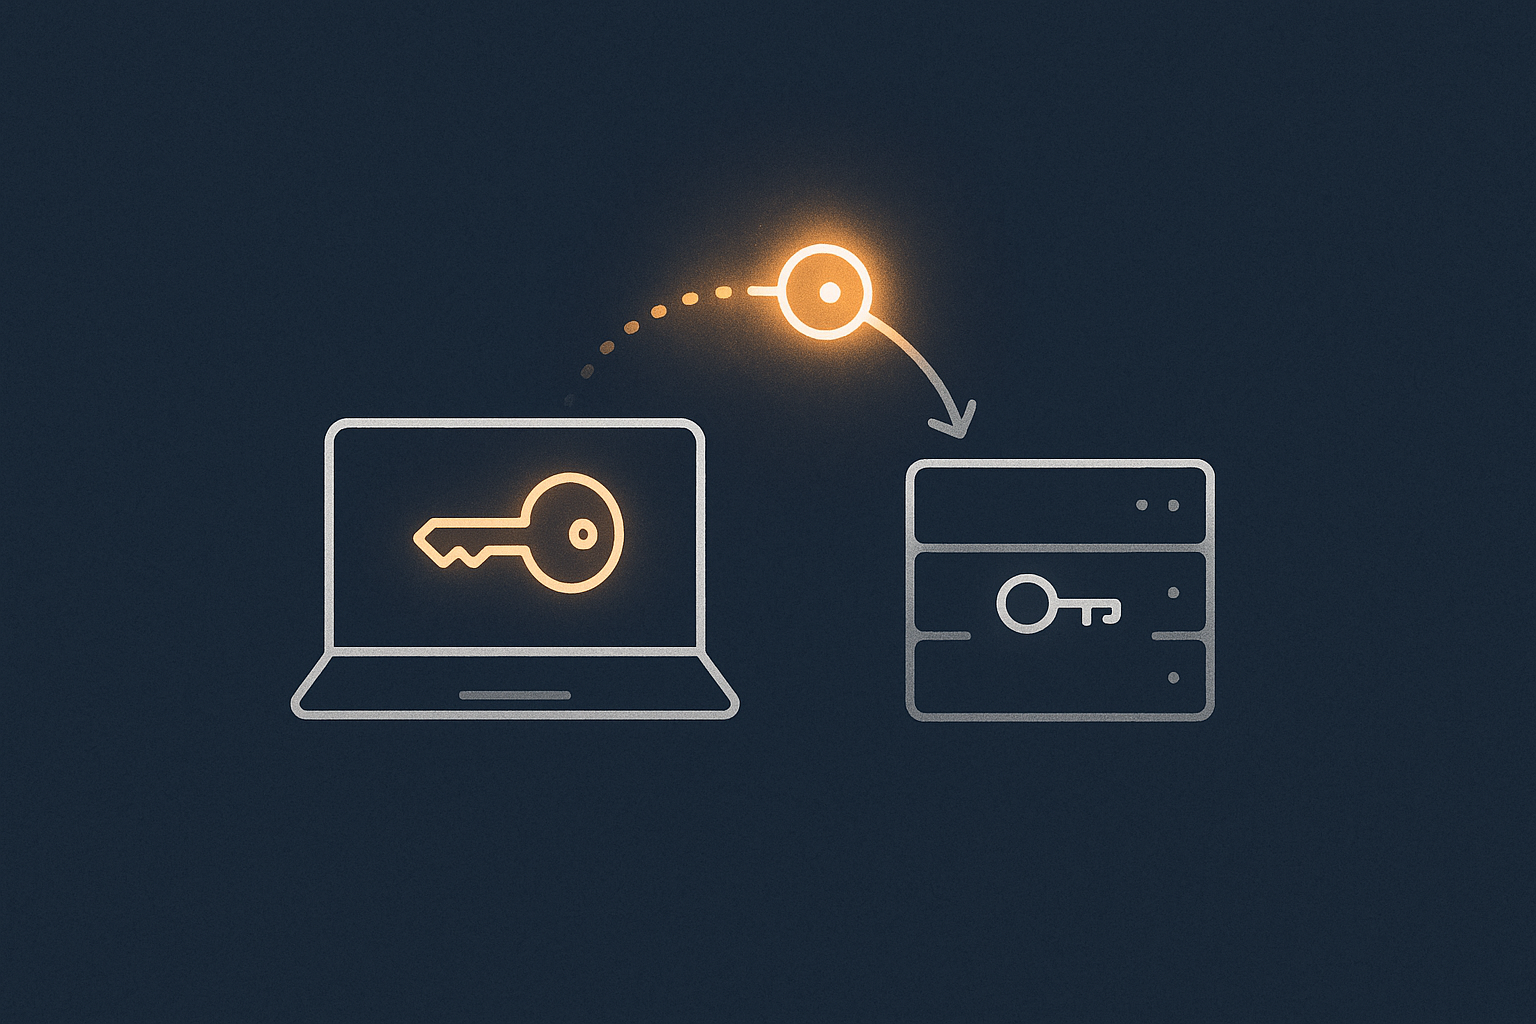
Why SSH keys are safer than passwords
SSH keys improve security and convenience at the same time:
- They are much harder to guess or brute force than typical passwords.
- You can protect the private key with a local passphrase.
- You can disable remote password logins entirely, so only devices with authorised keys can connect.
For WordPress and WooCommerce servers that are online 24/7, using keys plus disabling password logins significantly reduces automated login attempts that reach your SSH service.
Generating an SSH key pair on your computer
ssh-keygen on macOS / Linux (command and explanation)
On macOS or Linux, open your terminal and run:
ssh-keygen -t ed25519 -C "your-email@example.com"
This tells ssh-keygen to:
- Create a key of type
ed25519(modern and recommended). - Label it with a comment, often your email address.
It will ask:
Enter file in which to save the key (/home/you/.ssh/id_ed25519):
Press Enter to accept the default. Then it will ask for a passphrase. This protects your private key on your local machine. You can leave it empty, but using a passphrase is a good habit.
The result is two files:
~/.ssh/id_ed25519(private key, keep safe, never share).~/.ssh/id_ed25519.pub(public key, safe to copy to servers).
Generating keys on Windows (PuTTYgen or OpenSSH)
You have two main options:
- Windows OpenSSH (PowerShell or Windows Terminal)
Run the same command:ssh-keygen -t ed25519 -C "your-email@example.com"By default, keys will be stored in
C:\Users\YourName\.ssh\. - PuTTYgen
If using PuTTY, launch PuTTYgen, choose a key type (ED25519 or RSA), click “Generate”, and follow the on‑screen instructions. Save the private key to a secure location and copy the public key text for use on the server.
Where your private and public keys are stored
On most systems:
- The private key is in
~/.ssh/id_ed25519(orid_rsafor RSA). Protect this file and consider backing it up securely. - The public key is in
~/.ssh/id_ed25519.pub. You can view it with:cat ~/.ssh/id_ed25519.pub
You will copy this public key into ~/.ssh/authorized_keys on the server.
Installing your public key on the server
Using ssh-copy-id where available
If ssh-copy-id is installed on your local machine, you can add your key with one command.
ssh-copy-id adminuser@203.0.113.10
This will:
- Prompt for
adminuser’s password. - Append your public key to
/home/adminuser/.ssh/authorized_keyson the server.
After this, you should be able to SSH as adminuser without entering the server password.
Manual method: creating ~/.ssh and authorised_keys
If ssh-copy-id is not available, you can do this manually.
- On your local machine, display your public key:
cat ~/.ssh/id_ed25519.pubCopy the whole line to your clipboard.
- SSH into the server as
adminuser(using password for now). - Create the
.sshdirectory and set its permissions:mkdir -p ~/.ssh chmod 700 ~/.ssh - Edit or create
authorized_keys:nano ~/.ssh/authorized_keysPaste your public key as a single line, then save and exit (Ctrl + O, Enter, Ctrl + X).
Correct file permissions so SSH accepts your key
SSH is strict about permissions. On the server, run:
chmod 600 ~/.ssh/authorized_keys
chmod 700 ~/.ssh
This ensures that only your user can read your authorised keys and that the directory is not writable by others. Incorrect permissions are a common reason for key‑based logins failing.
Testing key‑based login and then disabling password logins
Testing in a separate terminal window
Open a new terminal on your local machine and try:
ssh adminuser@203.0.113.10
If your SSH client finds your private key and the server recognises the matching public key, you will be logged in. You may be prompted for your key’s passphrase (set when you ran ssh-keygen), which is different from the server password.
If this works, keep both the old and new sessions open for now.
Updating sshd_config to refuse passwords
Once you have confirmed keys work reliably, you can disable password authentication in /etc/ssh/sshd_config.
- Back up the file if you have not already:
sudo cp /etc/ssh/sshd_config /etc/ssh/sshd_config.backup - Edit it:
sudo nano /etc/ssh/sshd_config - Find or add the lines:
PubkeyAuthentication yes PasswordAuthentication no - Save and exit, then restart SSH:
sudo systemctl restart ssh # or sshd
Test again from a new terminal. This time, SSH should accept only your keys and refuse plain passwords.
When you should probably keep passwords enabled (for now)
It may be sensible to keep passwords enabled temporarily if:
- You frequently need to grant short‑term access to other people and do not yet have a process for distributing keys.
- You are not confident you have backed up your private key securely.
If you do keep passwords enabled, ensure they are strong and unique, and consider pairing them with additional hardening like Fail2ban, described later.
Day‑to‑Day SSH Use: Core Commands You Actually Need
Once you can log in reliably, you will mostly use a small set of commands. Used carefully, these are unlikely to cause harm and are essential for routine administration.
Navigating the filesystem without damage
pwd, ls, cd and tab completion
pwdshows your current directory:pwdExample output:
/home/adminuserlslists files:ls ls -l ls -la-lshows details.-aincludes hidden files (starting with.).
cdchanges directory:cd /var/www cd ~ # go to your home directory cd - # go back to previous directory
Use the Tab key for auto‑completion. For example, type cd /var/ww then press Tab, and the shell will usually complete it to /var/www.
Understanding where your web files live (for WordPress / WooCommerce)
Common locations for web files include:
/var/www/htmlon many Apache/Nginx setups./var/www/example.com/public_htmlon multi‑site setups.- Custom paths if using control panels or containerised stacks.
Within your site’s document root, you will see familiar WordPress files like wp-config.php, wp-content and wp-admin.
Use ls and cd to browse. Avoid deleting or moving anything until you are confident you know what it is.
Viewing and editing files safely
Using cat, less and tail -f for logs
Logs are invaluable when troubleshooting. Common log files include web server access and error logs, and PHP logs.
catprints the whole file:cat /var/log/syslogThis is fine for small files, but not ideal for long logs.
lesslets you scroll:less /var/log/syslogUse the arrow keys to move,
qto quit.tail -ffollows a log as it is written:tail -f /var/log/nginx/access.logThis is helpful when reproducing a problem in real time. Press
Ctrl + Cto stop.
Basic file edits with nano (safer for beginners)
For many people new to Linux, nano is the easiest text editor to start with.
To edit a file, for example a virtual host configuration:
sudo nano /etc/nginx/sites-available/example.com.conf
Key nano shortcuts:
- Edit the text as needed using the keyboard.
Ctrl + Oto save (“write out”).- Enter to confirm the filename.
Ctrl + Xto exit.
To undo changes, you can either manually revert them or restore from a backup copy of the file if you made one beforehand.
SAFETY NOTE: Always copy important config files before editing
Before editing any critical configuration file, make a copy with a date or suffix. For example:
sudo cp /etc/nginx/nginx.conf /etc/nginx/nginx.conf.backup-2025-12-03
If you make a mistake that stops the service from starting, you can restore the backup:
sudo cp /etc/nginx/nginx.conf.backup-2025-12-03 /etc/nginx/nginx.conf
This simple habit can save stress when working on production systems.
Managing services without crashing the server
systemctl status and restart for web / database services
systemctl is the main tool for managing systemd services such as Nginx, Apache, MySQL and PHP‑FPM.
- Check the status of a service:
sudo systemctl status nginxThis shows whether Nginx is running, when it last started and recent log messages.
- Reload configuration (where supported):
sudo systemctl reload nginxThis applies configuration changes without a full restart, which can be gentler on a busy site.
- Restart a service:
sudo systemctl restart php8.2-fpmOnly do this when you are ready for a brief interruption.
When to avoid restarting services on a busy production shop
Restarting a web or database service can cause a brief outage. For a busy WooCommerce shop or time‑sensitive site, try to:
- Schedule restarts in quieter periods.
- Test configuration changes on a staging server first, if possible.
- Warn stakeholders before any planned downtime.
If you are running a high‑traffic or revenue‑sensitive site and would rather offload this kind of operational risk, a managed VDS is often a better fit.
Commands to treat with extreme caution
rm, recursive deletes and wildcards
Warning:
The rm command permanently deletes files and directories. There is no built‑in undo.
rm file.txtdeletes a file.rm -r directorydeletes a directory and everything inside it recursively.rm -rf /pathadds “force” to skip prompts. Used incorrectly, it can delete large parts of the system.
Be very careful with wildcards such as *. Always triple‑check paths before pressing Enter.
chmod and chown on web folders
chmod changes permissions, chown changes ownership.
chmodexample:chmod 644 file.phpchownexample:sudo chown www-data:www-data -R /var/www/html
Incorrect use can make your site inaccessible or insecure. Before changing ownership or permissions for entire directories, consider documenting the current settings and, if unsure, consulting your provider or documentation for your web stack.
Why copy‑pasting random commands from the internet is dangerous
Many blog posts and forum answers contain commands tailored to different setups. Running them without understanding what they do can cause problems, for example:
- Removing packages your server needs.
- Opening firewalls more widely than intended.
- Changing permissions in a way that exposes data.
A good habit is to read each command carefully, try to understand it, and where possible test on a non‑production server first.
Basic SSH Hardening: Small Changes That Help A Lot
Once you have reliable logins and a non‑root user, a few additional measures can significantly improve your security posture.
Changing the SSH port (optional and not a silver bullet)
Moving SSH from port 22 to another port can reduce automated noise from bots that scan common ports. It does not replace stronger measures such as keys or Fail2ban, but it can help tidy your logs.
How to change the port in sshd_config
- Choose a new port number, for example
2222. Avoid well‑known ports used by other services. - Edit
sshd_config:sudo nano /etc/ssh/sshd_config - Find the line that sets the port, or add one:
Port 2222 - Save and exit.
Updating your firewall rule before restarting SSH
Important:
Update your firewall to allow the new port before restarting SSH, otherwise you may lock yourself out.
For example, with UFW:
sudo ufw allow 2222/tcp
sudo ufw delete allow 22/tcp
Then restart SSH:
sudo systemctl restart ssh # or sshd
Test the new port from a second terminal:
ssh -p 2222 adminuser@203.0.113.10
Again, keep your existing session open until you have confirmed the new connection works.
Limiting who can log in via SSH
AllowUsers / AllowGroups examples
In sshd_config, you can explicitly list which users or groups are allowed to log in.
For example, to allow only adminuser and deploy:
AllowUsers adminuser deploy
Or to allow only members of a group, for example sshusers:
AllowGroups sshusers
Remember to restart SSH after changes and test from a new session.
Practical examples for agencies running multiple sites
If you manage multiple client sites on one server, you might:
- Create separate users or groups for each client or project.
- Add only trusted staff accounts to the group allowed to use SSH.
- Use keys for each person so you can revoke access individually by removing their public key.
This gives you more control than sharing a single login between multiple people.
Fail2ban and firewalls: protecting against brute force
How Fail2ban works at a high level
Fail2ban watches log files for repeated failed login attempts. When it sees too many from one IP address, it adds a temporary firewall rule to block that address.
This can reduce noise from bots trying password combinations against your SSH service.
Linking SSH to your basic Linux firewall setup
Fail2ban usually integrates with tools such as UFW or iptables to apply its bans. On many distributions, there is a pre‑built “jail” configuration for SSH, which you can enable and tune carefully.
When pairing Fail2ban with manual firewall rules, it helps to understand exactly which ports are open and to whom. The firewall article mentioned earlier goes into more detail on designing these rules so you do not accidentally block yourself.
When to leave this to managed hosting rather than DIY
Managing Fail2ban rules, firewall policies and log alerts is an ongoing task, not a one‑time switch. If you do not want to spend regular time on:
- Monitoring logs.
- Adjusting ban thresholds.
- Responding to unusual access patterns.
it may be more practical to use a managed VDS where this layer is designed and monitored for you, or to take advantage of provider‑level server‑level security features.
Troubleshooting Common SSH Problems
Even with careful setup, SSH connections will sometimes fail. Knowing where to look saves time and reduces guesswork.
Connection timed out or refused
Quick checks: IP, DNS and firewall
If your SSH client hangs and eventually says “Connection timed out”, or immediately reports “Connection refused”, start with these checks:
- Confirm the IP or hostname is correct and resolves:
ping server1.example.comor
nslookup server1.example.com - Check you are using the correct port:
ssh -p 2222 adminuser@203.0.113.10 - Review firewall rules on the server and any cloud security groups to ensure the SSH port is allowed from your IP.
Checking SSH is actually running (systemctl status ssh/sshd)
If you still have console access (for example through your provider’s web console), log in and run:
sudo systemctl status ssh # or sshd
If the service is inactive or failed, the status output will usually include an error message. You can attempt to start it:
sudo systemctl start ssh
If it fails immediately, check for typos in sshd_config or restore your backup copy and try again.
Permission denied (publickey or password)
Typical key permission mistakes on ~/.ssh
If you see:
Permission denied (publickey).
common causes include:
authorized_keysmissing or containing the wrong key.- Incorrect permissions on
~/.sshorauthorized_keys.
On the server, as the affected user, run:
chmod 700 ~/.ssh
chmod 600 ~/.ssh/authorized_keys
Then try again. Also confirm that the key in authorized_keys exactly matches your local id_ed25519.pub.
Using -v for verbose SSH output to see what is wrong
On your local machine, you can ask SSH to show more detail:
ssh -v adminuser@203.0.113.10
The -v flag prints debugging information, including which keys it tries and why authentication fails. For even more detail you can use -vv or -vvv.
Where to look in logs when SSH goes wrong
auth.log / secure log basics
On the server, SSH logs are usually in:
/var/log/auth.logon Debian/Ubuntu systems./var/log/secureon CentOS/RHEL‑style systems.
You can inspect recent entries with:
sudo tail -n 50 /var/log/auth.log
or
sudo tail -n 50 /var/log/secure
Look for lines mentioning sshd around the time of your connection attempts. The companion article Understanding System Logs on Linux and Where to Find Them goes deeper into interpreting these logs.
What “too many authentication failures” means in practice
If you see “Too many authentication failures”, it often means your SSH client is trying multiple keys before the right one, and the server is cutting off the connection.
You can explicitly tell SSH which key to use:
ssh -i ~/.ssh/id_ed25519 adminuser@203.0.113.10
or adjust your local SSH configuration in ~/.ssh/config to specify keys per host.
When You Should Consider Managed Hosting Instead
SSH gives you fine‑grained control, but also adds ongoing responsibilities. It is useful to know where the boundary lies between reasonable DIY and tasks better delegated.
Tasks that are reasonable for a careful beginner
User management, keys and small config tweaks
With care and backups, many administrators comfortably handle:
- Creating non‑root users with sudo access.
- Setting up SSH keys and disabling password logins.
- Editing single configuration values (for example adjusting a PHP memory limit) with a backup in place.
Checking basic service status and reading logs
Using systemctl status, tail and less to check on services and review logs is low risk and very useful. It helps you identify whether a problem is at the web server, PHP or database layer before involving support.
Tasks that are better handled by a managed VDS
Ongoing security hardening, monitoring and incident response
Activities such as:
- Designing and maintaining firewall policies.
- Tuning Fail2ban and intrusion detection rules.
- Setting up monitoring, alerts and responding to incidents.
are ongoing disciplines rather than one‑off tasks. If this feels like a distraction from your main work, a managed VDS can offload that operational layer.
Complex web stack tuning for busy WordPress / WooCommerce sites
For high‑traffic or revenue‑critical sites, deeper tuning is often required:
- PHP‑FPM pool and worker settings.
- Database query performance and indexing.
- Reverse proxies, caching and content delivery.
These tasks can have a large performance impact, positive or negative. For such sites, either a managed VDS or Managed WordPress hosting for business sites is often more sustainable than ad‑hoc tuning by someone who has to juggle many roles.
How SSH fits into a bigger picture of hosting responsibility
SSH is one part of the broader responsibility balance between you and your provider. If you are wondering where that line sits, the article Understanding Hosting Responsibility: What Your Provider Does and Does Not Cover is a helpful next read.
Next Steps: Building Confidence With SSH Safely
A simple practice routine on a non‑critical server
The safest way to build confidence is to practise on a staging or low‑risk server. For example, you might:
- Spin up a small VPS separate from production.
- Practise:
- Logging in as a non‑root user.
- Setting up keys.
- Editing configuration files with nano.
- Restarting services and watching logs.
- Keep a simple change log of what you did and what you observed.
Once you are comfortable, you can apply the same steps to production with more confidence and planning.
Related reading in the G7Cloud Knowledge Base
From here, natural next topics include:
- How to Safely Update and Patch a Linux Server (Without Breaking Your Sites) to keep your system secure and current using SSH.
- The firewall and logging articles linked earlier, to deepen your understanding of how SSH, firewalls and logs work together.
- When Managed Hosting Makes Sense for Growing Businesses if you are evaluating whether to continue self‑managing SSH and server operations or to move to a managed VDS or managed WordPress solution.
If you prefer to focus on your sites and let someone else handle daily SSH access, monitoring and tuning, you may find it helpful to explore G7Cloud’s managed and unmanaged virtual dedicated servers and decide which level of responsibility suits you best.