A Practical Guide to WordPress Staging Sites for UK Businesses
Why Staging Sites Matter for UK WordPress and WooCommerce Sites
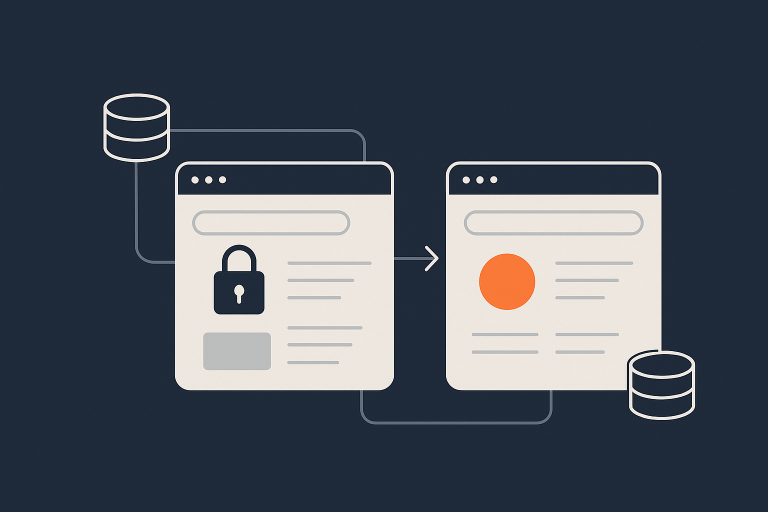
What a staging site actually is in plain English
A staging site is a private copy of your live WordPress or WooCommerce site where you can safely test changes before they go public.
Think of it as a rehearsal stage for your website. You can:
- Update WordPress, plugins and themes
- Try new designs or page layouts
- Test checkout changes or new payment gateways
- Experiment with performance or security tweaks
All of this happens away from real customers, real orders and search engines. When you are happy, you deploy the changes to the live site in a controlled way.
Real world problems staging helps you avoid
For UK businesses, the risks of working directly on the live site are not theoretical. Typical problems that staging helps you avoid include:
- Checkout failures: Updating WooCommerce or a payment plugin live, only to find customers cannot pay with cards or PayPal.
- Broken layouts: A page builder update that breaks your home page on mobiles for hours before anyone notices.
- Plugin conflicts: Adding a marketing or shipping plugin that conflicts with an existing one and triggers PHP errors.
- Performance regressions: A new visual feature or slider that quietly doubles page load times and hurts conversions.
- Security misconfigurations: Hardening steps that lock you or your team out of wp-admin.
All of these are much easier to spot and fix on a staging copy, where you can click through key user journeys without rush or pressure.
When you absolutely should not test on the live site
There are situations where working directly on the live site is a very bad idea:
- Busy WooCommerce shops with regular orders or bookings.
- Sites running paid ads, where each broken click costs money.
- Membership, LMS or community sites where user logins and content updates happen all day.
- Major upgrades such as PHP version changes, big theme replacements or a full page builder switch.
- Security changes such as WAF rules, login protection or 2FA rollout.
For these cases, a proper staging workflow combined with solid backups is essential rather than optional.
Key Concepts: Live, Staging, Development and Backups
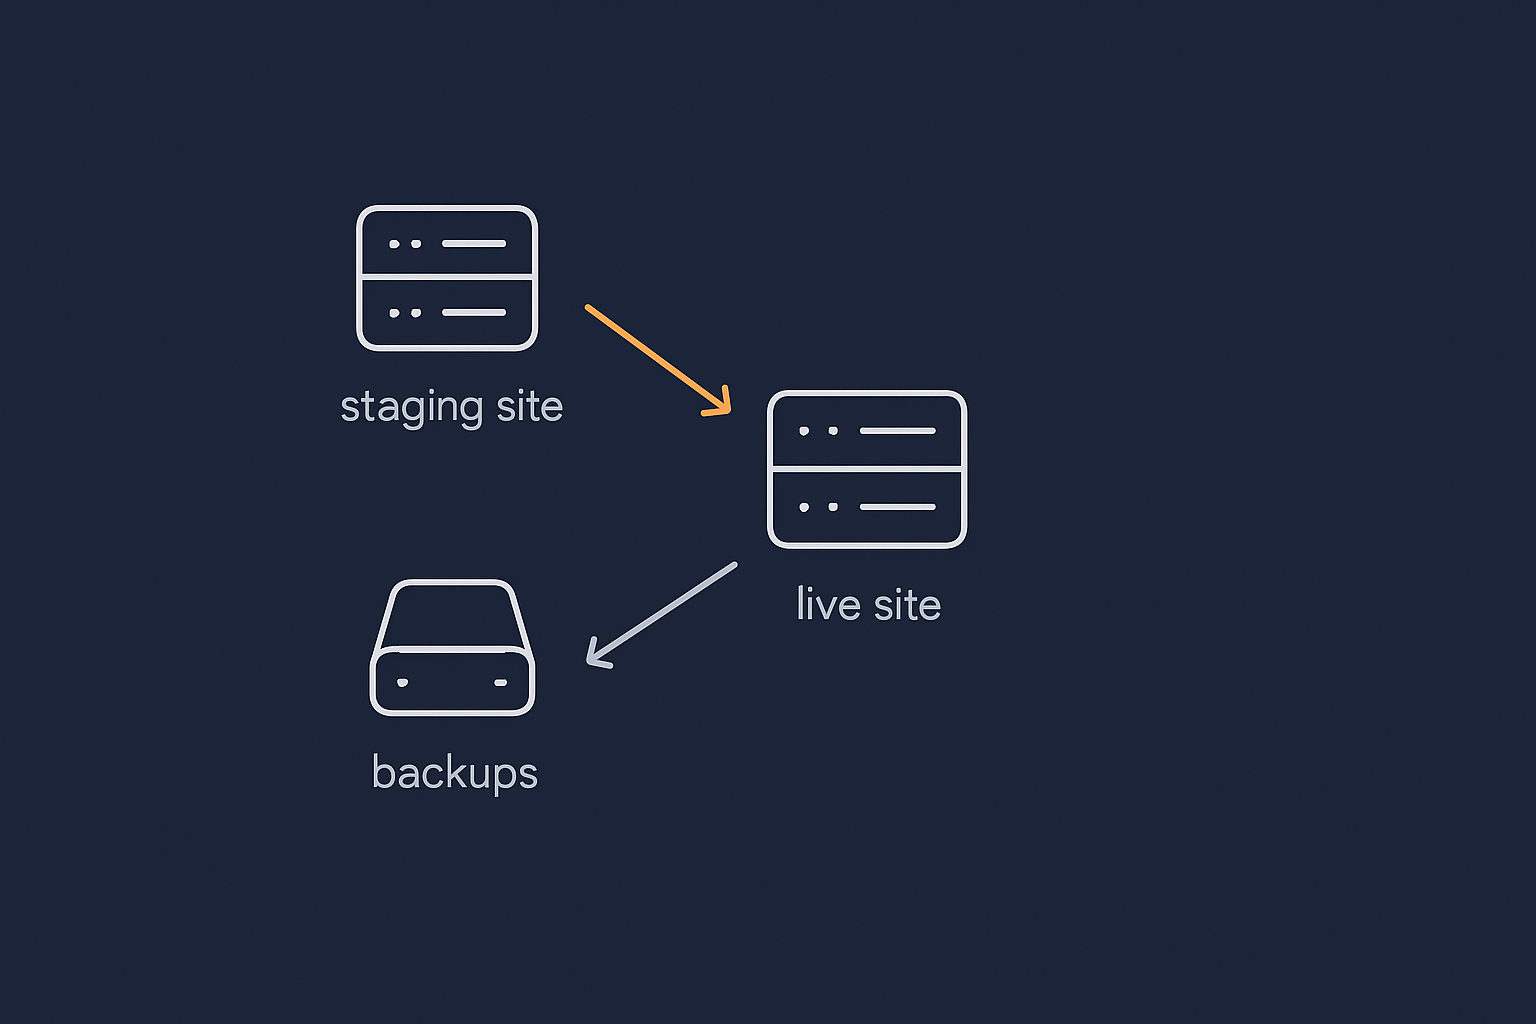
How a staging copy relates to your live WordPress site
Your live site is what customers and search engines see. A staging site is a clone of this, usually on a subdomain like staging.example.co.uk or within a separate hosting environment.
A good staging setup copies:
- The database (content, settings, orders, users)
- Files (themes, plugins, uploads, media)
Once the copy is made, live and staging diverge. You make changes on staging, test them, then selectively deploy those changes back to live. This can be automated by your host, handled by a plugin, or done manually by a developer.
Staging vs backups vs local development
It helps to separate three ideas:
- Backups: Point-in-time copies of your site that you restore if something goes badly wrong. They are a safety net, not a workspace.
- Staging: A working clone where you test and refine changes before deployment.
- Local development: Developers working on their own machines with tools like Local, DevKinsta or Docker, usually for larger or custom builds.
In practice many UK SMEs will use:
- Automatic daily backups by the host, plus an on-demand backup before big changes.
- A staging environment provided by their managed WordPress hosting for UK businesses.
- Occasional local development by an agency when building new features.
If you want more detail on backups as part of this picture, the guide What Every WordPress Owner Should Know About Backups and Restores is a good next read.
How often you should refresh and use staging
Practical guidelines for small and mid-sized businesses:
- Routine updates (WordPress core, plugins, themes): use staging monthly or at least before large batches of updates.
- Significant changes (new theme, checkout redesign, new membership features): always use staging and keep the copy close in date to live.
- High traffic WooCommerce sites: maintain a semi-permanent staging site and refresh it before each sprint of changes.
You do not need to refresh staging every day. The key is to refresh it before each round of substantial work, so your tests reflect the current live data and configuration.
What Makes a Good WordPress Staging Setup?
Separate database and files so changes do not leak
Staging must have its own database and file structure. If staging shares a database with live, changes such as new pages, settings, users or orders could leak across.
A sound setup will ensure:
- Separate database: Staging uses its own database, with its own credentials in
wp-config.php. - Distinct file paths: Staging lives in a different directory from live, usually with its own
wp-contentfolder. - Configured URLs: The
siteurlandhomevalues in the database point to the staging domain, not the live one.
Hosts that provide integrated staging environments, such as those offering managed WordPress hosting for UK businesses, usually handle this isolation automatically. If you are setting it up manually, be meticulous about database credentials and URL replacements.
Password protection and blocking search engines
Your staging site should not be publicly accessible.
Protect it with:
- HTTP authentication (a username and password prompt before you even see the site).
- WordPress logins for finer access control inside wp-admin.
You should also block indexing by search engines:
- In WordPress, enable “Discourage search engines from indexing this site” under Settings → Reading.
- Use a
robots.txtrule such asDisallow: /on the staging domain.
Relying only on the “Discourage search engines” option is not enough, because it does not restrict human access. Proper HTTP authentication avoids customers stumbling across half finished work and removes the risk of duplicate content penalties.
Performance and environment matching for realistic testing
To be useful, staging should resemble your live environment closely:
- Same PHP version and key extensions.
- Same database engine and major version.
- Similar caching configuration and object caching where relevant.
- Similar server resources (within reason) so you can spot performance issues.
If your production site uses a performance layer such as the G7 Acceleration Network for caching and optimisation, test with that enabled on staging where possible. This helps you catch problems with cache exclusions, logged-in behaviour and dynamic pages before deployment.
Security and access control for agencies and freelancers
Many UK SMEs work with external developers, agencies or freelancers. Staging is an ideal place for them to work, but you still need control.
Look for options such as:
- Separate logins for hosting and WordPress, so developers do not access billing or unrelated projects.
- Per-site access at hosting level, so freelancers can only see the relevant staging and live sites.
- Role management within WordPress, limiting access for users who should not touch settings or plugins.
- IP allowlisting or VPN requirements for particularly sensitive projects.
Where your host offers a hassle free WordPress maintenance service, they will often manage routine updates and basic staging workflows for you, reducing the number of external parties needing deep access.
How to Create a WordPress Staging Site: Main Options
1) Hosting provided staging environments (recommended for most UK SMEs)
The cleanest approach is using staging built into your hosting control panel. Many providers of managed WordPress hosting for UK businesses or WooCommerce hosting that can handle real world traffic provide one click cloning tools.
Typical features include:
- One click “Clone to staging” and “Push to live”.
- Options to push only files, only database or both.
- Automatic search and replace of URLs during cloning.
- Separate SFTP/SSH access for staging.
This approach is usually best for non technical teams, because the provider handles the plumbing and you focus on testing.
2) Staging via plugins on standard shared hosting
If your host does not offer staging, certain plugins can create basic staging environments, often by cloning the site to a subdirectory or subdomain.
Trade offs:
- Convenient, but can be slower or less reliable on overcrowded shared hosting.
- You will usually share the same server resources between live and staging, which may affect performance during heavy testing.
- Push to live tools might be more limited or risk overwriting data if misconfigured.
This can work for low traffic brochure sites and small blogs, but for transactional sites such as shops or membership platforms, host level staging is safer.
3) Manual staging on a subdomain or separate account
Developers often set up manual staging environments using a separate account or subdomain, and then:
- Copy the site files.
- Export the database and import it into a new database.
- Update
wp-config.phpwith new database credentials. - Run a search and replace on the database to update URLs.
This gives full control but also requires care to avoid misconfigurations. You will need to:
- Set up HTTP authentication and block indexing.
- Keep PHP, database and key settings aligned with live.
- Plan and script your deployment process to avoid accidental data loss.
Which option is right for your business?
In practice:
- Most SMEs will be best served by hosting provided staging environments that are simple and repeatable.
- Very small or hobby sites might get by with plugin-based staging on shared hosting, provided they accept the limitations.
- Larger or bespoke sites will benefit from a combination of manual staging and proper development environments managed by an agency.
If moving to a better platform is already on your mind, some providers include free, zero downtime WordPress migration help, which is a good moment to get staging set up correctly at the same time.
Step by Step: Safe Staging Workflow for Business Websites
Step 1: Make (and test) a backup before you touch anything
Before cloning to staging or applying updates, take a fresh backup of your live site. Ideally this is:
- A full file and database backup created via your host, and
- An additional offsite or plugin-based backup for extra safety.
Confirm the backup is complete. If your host supports quick restores, perform a small test restore in a disposable environment at least once, so you know the process works. For a walkthrough, see How to Back Up Your WordPress Site.
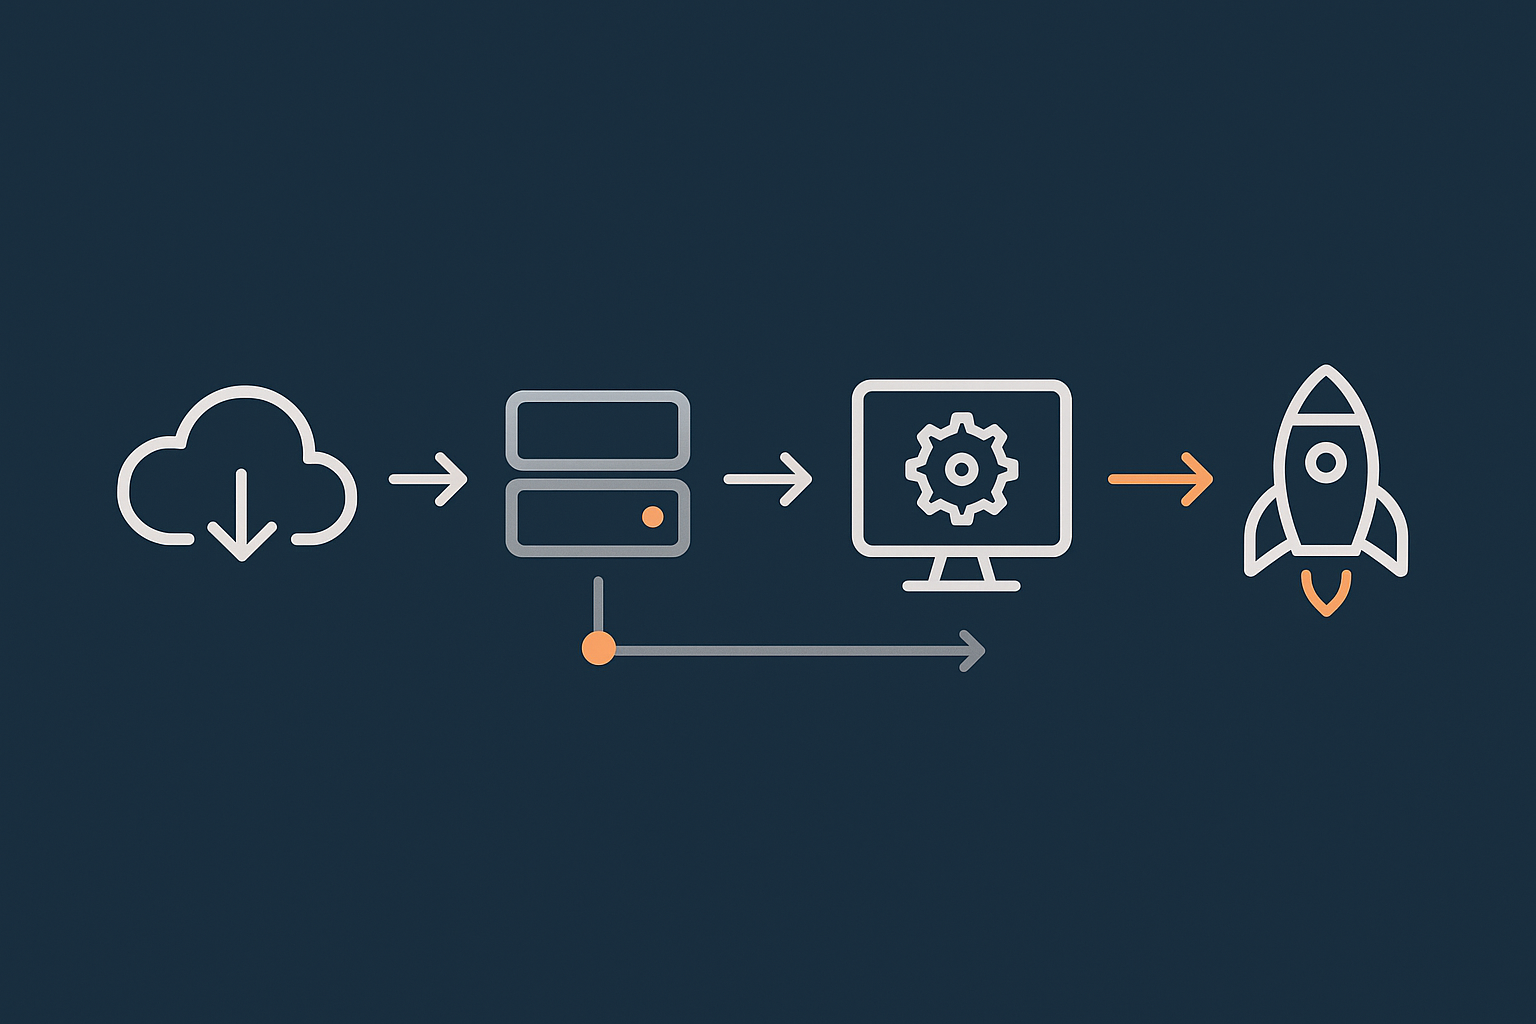
Step 2: Create or refresh your staging copy
Next, create or refresh your staging environment:
- Use the hosting staging tool to clone live to staging, or
- Use your chosen staging plugin, or
- Follow your manual cloning process.
After cloning, do a quick check:
- Log in to staging wp-admin.
- Ensure URLs show the staging domain, not the live one.
- Confirm that customer facing pages load without obvious errors.
- Confirm password protection and robots blocking are in place.
Step 3: Apply updates, new plugins or code changes on staging
Once your staging copy is healthy, perform your planned work:
- Run WordPress core, plugin and theme updates.
- Install and configure new plugins.
- Apply theme or CSS changes.
- Implement performance or security tweaks.
Make a note of:
- Which plugins you updated and from which version.
- Any configuration changes, including settings pages and code snippets.
- Any database migrations or imports you ran.
These notes help you mirror the changes on live, especially where automated push-to-live tools do not cover every aspect.
Step 4: Test key user journeys thoroughly
Testing is where staging earns its keep. For a business site, focus on:
- Homepage and landing pages: Load on desktop and mobile, checking layout, images and CTAs.
- Lead generation: Contact forms, quote forms and newsletter signups.
- WooCommerce:
- Add products to basket.
- Apply coupons or vouchers.
- Walk through the full checkout using test payment methods.
- Account areas: Login, registration, password reset, order history.
- Performance basics: Check page speed and responsiveness, especially on product and category pages.
For security changes such as those described in How to Harden WordPress Without Breaking Your Site, testing on staging helps ensure legitimate users and integrations remain unaffected.
Step 5: Push changes to live without losing data
Deployment strategy depends on how your staging is set up and whether your site is transactional.
For brochure or low interaction sites, you can often:
- Use the host’s “Push to live” tool to sync both files and database, or
- Manually copy files and import the staging database to live.
For WooCommerce or membership sites, you must protect live data:
- Avoid overwriting the entire live database from staging, as this can erase recent orders, signups or content changes.
- Prefer deployments that:
- Push files only (themes, plugins, custom code), and
- Apply database changes manually (settings, options) or via migration tools that target specific tables.
- Plan a short low-traffic window for deployment where possible.
Some managed hosting platforms provide granular push options or work with your developer to set up safe deployment scripts. Where you have a hassle free WordPress maintenance service, they will usually handle this process on your behalf.
Step 6: Monitor live site after deployment
After changes go live, keep an eye on:
- Uptime and error monitoring.
- Checkout completion rates and form submissions.
- Support tickets or customer feedback that might indicate issues.
Using an external uptime monitoring service and basic alerting completes the loop. For a deeper look at this side of things, see Why Uptime Matters and How to Monitor Your WordPress Site Properly.
Special Considerations for WooCommerce Staging Sites
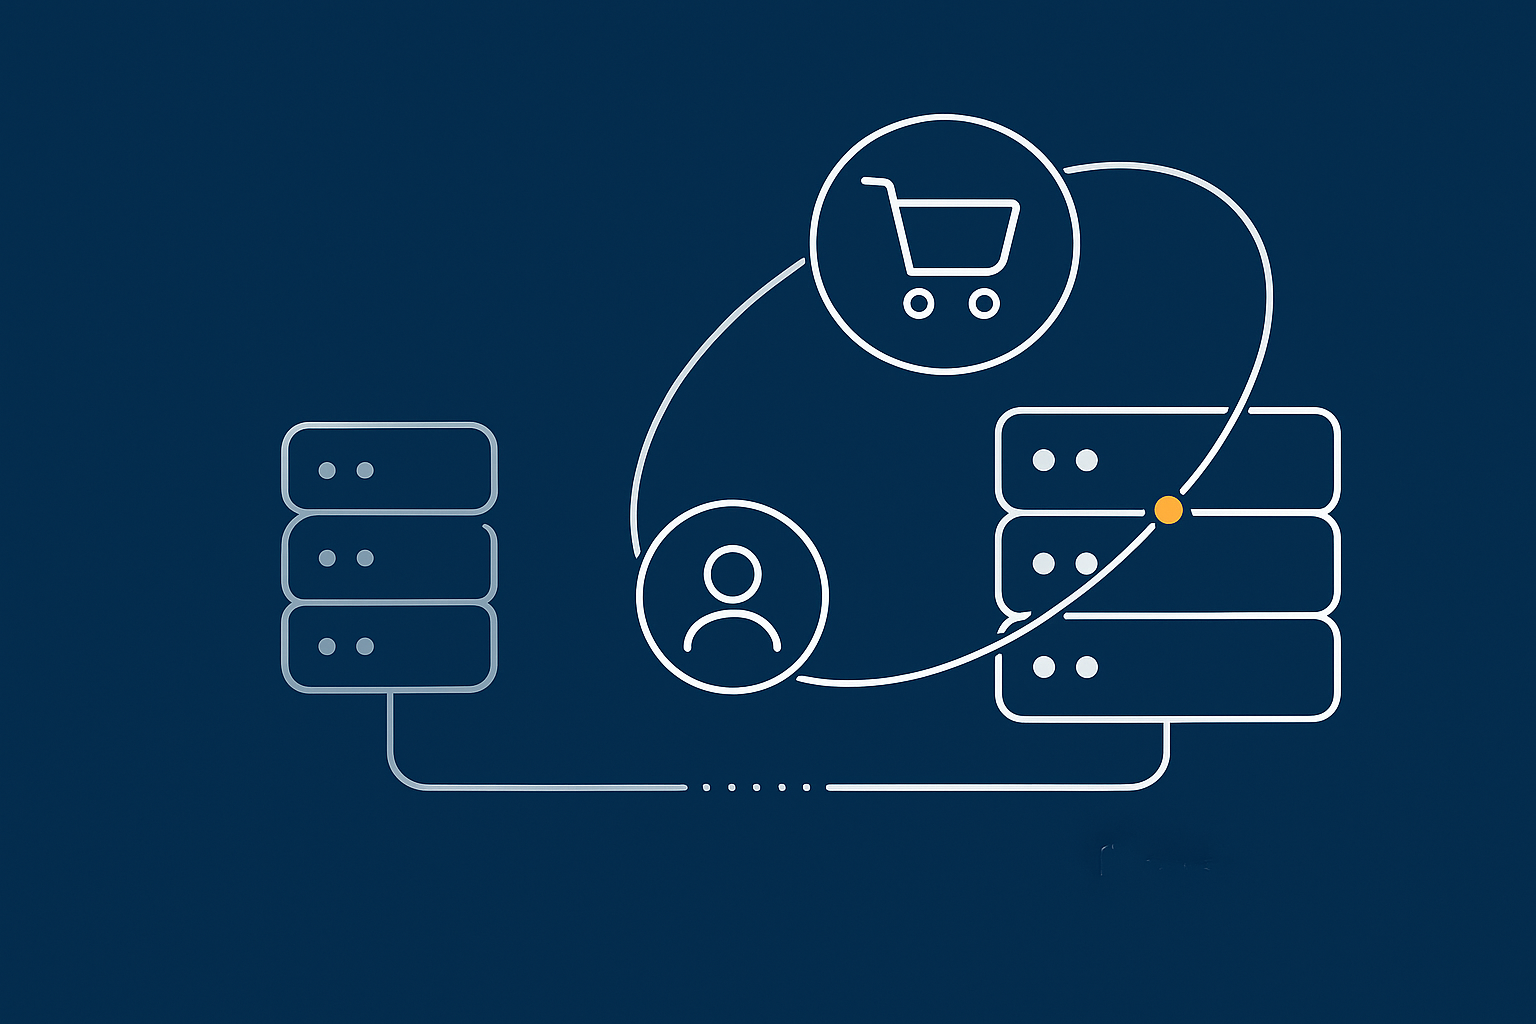
Orders, customers and stock: keeping data in sync
WooCommerce introduces extra complexity because data is constantly changing: new orders, customer registrations, stock adjustments and refunds.
Guidelines:
- Never overwrite the live database wholesale from staging once your shop is taking orders.
- Use a recent clone when starting work, to minimise drift between staging and live.
- Freeze certain activities for a short deployment window if necessary, for example temporarily disabling self-serve account edits.
- Target specific tables if you must move database changes, such as WooCommerce settings, rather than customers or orders.
For complex shops, it is often worth involving a developer to design a deployment process that respects WooCommerce’s data model.
Handling payment gateways, emails and third party integrations
On staging, you usually want:
- Payment gateways in test/sandbox mode so you are not charging real cards.
- Transactional emails such as order confirmations disabled, or routed to a test address.
- External systems (CRMs, fulfilment, accounting) either disconnected or clearly marked as test pipelines.
Practical tips:
- Use WooCommerce’s built in test gateways where possible.
- Set a distinct email subject prefix on staging using a small mu-plugin, for example
[STAGING], so you never confuse staging with live notifications. - Check webhooks and API credentials are safe to use in a test context.
Peak trading, flash sales and testing performance safely
For UK shops with busy periods such as Black Friday, Christmas or seasonal campaigns, staging is essential for rehearsing:
- Flash sale coupon rules and expiry dates.
- Stock behaviour and backorders.
- Queueing systems or maintenance messages for limited drops.
- Front end performance under heavier catalogues and promotional content.
If your host provides extra performance tooling such as the G7 Acceleration Network, test your sale pages on staging with caching rules in place so you know what is cached and what should stay dynamic. This lets you tune cache exclusions for baskets and checkouts before traffic spikes.
Bot traffic can also become a problem around sales. Where your platform includes bot filtering, such as G7Cloud’s protection within the G7 Acceleration Network, abusive and non human requests are filtered before they reach PHP or the database, which helps keep response times stable during busy campaigns.
Avoiding Common Staging Mistakes
Staging site accidentally visible to the public or Google
Typical causes:
- Forgetting to password protect the staging domain.
- Leaving XML sitemaps enabled on staging.
- Not setting
noindexor robots rules.
Prevent this by:
- Using HTTP authentication at server level for all non live sites.
- Blocking search engines in both WordPress and
robots.txt. - Disallowing indexing via your SEO plugin on staging domains.
Overwriting real customer data when pushing to live
This is the biggest risk with WooCommerce, membership and booking sites. To avoid it:
- Use push-to-live tools that support files only deployments for transactional sites.
- Avoid plugins or scripts that overwrite the full live database once the site is in active use.
- Plan deployments for low traffic windows and take a final pre-deployment backup.
Testing with the wrong PHP or plugin versions
Staging is effective only if it reflects live:
- Keep PHP versions aligned between live and staging.
- Ensure key server software and caching behaviour matches.
- Refresh staging regularly so that plugin and theme versions start in sync before you begin testing.
If you want to test a new PHP version, do it on staging first but then update live to that same version immediately after, once you are confident everything works.
Forgetting about backups and rollback plans
Staging reduces risk but does not remove the need for recovery plans. Before any major deployment:
- Take a new full backup of the live site.
- Confirm how you would roll back quickly if something breaks.
- Let your team know about the deployment window and fallback plan.
Document a simple rollback checklist: who restores the backup, who tests key journeys and who communicates with stakeholders if there is an issue.
How Managed Hosting and Tooling Can Simplify Staging
What your hosting provider should offer for staging
A good hosting platform simplifies staging so that non developers can use it safely. Features to look for include:
- One click creation of staging from live (and vice versa).
- Granular push options: files only, database only or selected tables.
- Automatic backups before each push-to-live operation.
- Automatic URL rewrites during cloning.
- Built in password protection and noindex for staging sites.
Providers of managed WordPress hosting for UK businesses often include these tools, plus tuned PHP, database and caching settings that reduce surprises when moving between staging and live.
Using maintenance services so you do not live in staging
While staging is important, you should not have to spend your working life in it. Many SMEs want the safety of staging without having to plan every update personally.
Maintenance services such as a hassle free WordPress maintenance service typically cover:
- Regular updates performed on staging first.
- Automated and manual testing of key site functions.
- Scheduled deployments during quiet periods.
- Backups and quick rollback if anything misbehaves.
This suits teams who prefer to focus on content, marketing and operations rather than managing the technical process around updates.
Where staging fits alongside performance, security and uptime tooling
Staging is one part of a broader toolkit for keeping your site fast, secure and reliable.
- Performance: Use staging to test caching rules, lazy loading and front end changes before they impact live. If your platform includes a performance layer such as the G7 Acceleration Network, staging is where you fine tune cache exclusions for WooCommerce baskets and account areas.
- Security: Test firewall rules, rate limiting and login protection on staging. Where there is built in bot filtering such as G7Cloud’s bot protection within the G7 Acceleration Network, abusive crawlers are blocked before they reach PHP or MySQL, which supports more consistent performance and reduces downtime risk.
- Uptime: Combine staging based testing with live uptime monitoring, so you are alerted quickly if something slips through.
Practical Next Steps for Your WordPress or WooCommerce Site
Simple staging checklist for your next round of changes
For your next batch of updates or new features, follow this condensed checklist:
- Confirm you have recent, working backups.
- Create or refresh your staging environment from live.
- Check staging is protected and not indexed by search engines.
- Apply updates, new plugins or code changes on staging.
- Test key user journeys (forms, checkout, logins, performance).
- Plan your deployment window and rollback approach.
- Push changes to live using a method that protects real data.
- Monitor uptime and conversions for any unexpected changes.
When to bring in a developer or managed host
DIY staging is realistic for many UK businesses, especially for straightforward sites and routine updates. However, it is worth involving a developer or moving to managed WordPress hosting for UK businesses when:
- You run a busy WooCommerce shop where mistakes cost real revenue.
- You need to roll out complex changes such as custom checkout flows, subscriptions or integrations with fulfilment, CRM or accounting.
- You are planning a major redesign or platform migration.
- You lack time or confidence to manage backups, staging and deployments consistently.
If you recognise your own situation in that list, exploring managed WordPress or WooCommerce hosting that can handle real world traffic is a sensible next step. Look for a provider that treats staging, backups, performance and security as standard, not extras, so you can test safely without turning website maintenance into a second job.