Planning a Smooth WordPress or WooCommerce Migration: A Step‑by‑Step Checklist for UK Businesses
Who This Migration Checklist Is For
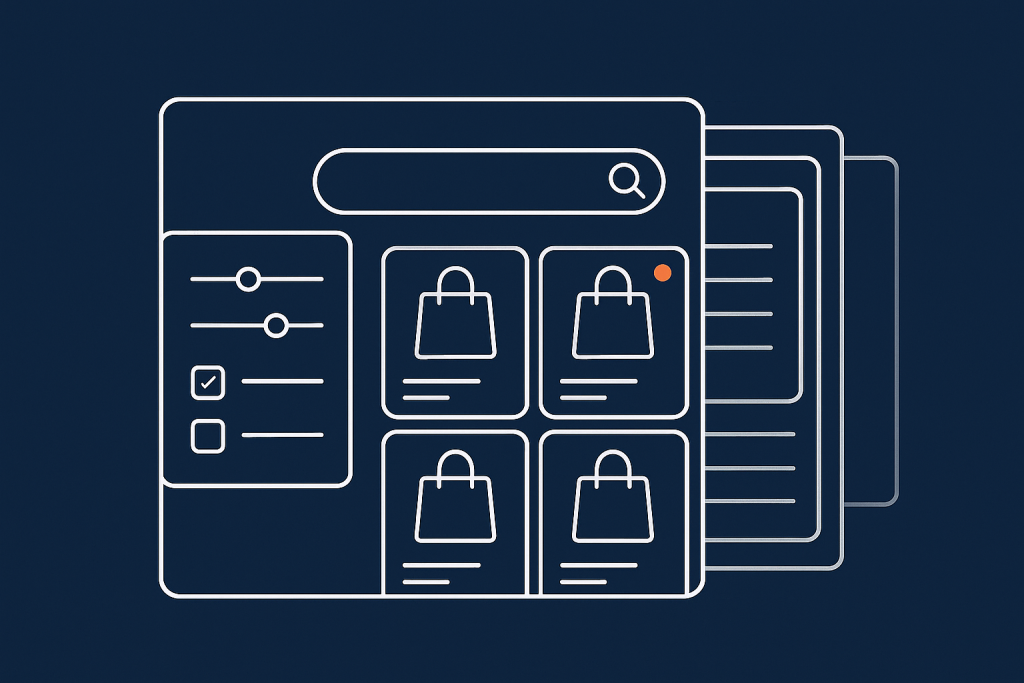
Typical situations where you need to move WordPress or WooCommerce
This checklist is written for UK businesses already running WordPress or WooCommerce and planning to move to new hosting. Typical triggers include:
- Slow page loads, timeouts or frequent “Error establishing a database connection”.
- Hosting that regularly falls over during campaigns, email newsletters or peak trading days.
- Limited or slow support, especially outside 9–5.
- Outgrowing basic shared hosting as your catalogue, traffic or membership base grows.
- Needing better security, backups or compliance (for example stronger PCI posture).
- Wanting managed WordPress or specialist WooCommerce hosting so your team can focus on content and trading rather than servers.
- Consolidating multiple sites or domains into one platform.
Even if your new provider offers a free managed WordPress migration service, it is still worth understanding the steps. You stay in control of timing, communication and what “success” looks like.
What can go wrong if you treat migration as “just copying files”
A WordPress site is more than files. It is a combination of:
- PHP and web server configuration
- MySQL or MariaDB database
- DNS and email records
- Cron jobs, background tasks and integrations
If you just copy files and a database export without planning you risk:
- Downtime: DNS misconfiguration, wrong database credentials or missing SSL certificates.
- Lost orders or enquiries: WooCommerce and form submissions landing on the old host while some visitors hit the new one.
- Broken logins and redirects: Incorrect URL search‑and‑replace or changes to cookie paths.
- SEO issues: Missing redirects, changed URLs or blocked crawlers.
- Email interruptions: MX or SPF records accidentally changed or lost.
- Security gaps: Firewalls, security plugins or WAF rules not re‑applied.
Key differences between migrating a brochure site and a live WooCommerce shop
Brochure and lead‑generation sites are relatively straightforward. Most content is static and you can afford a short maintenance window if required.
WooCommerce shops, memberships and e‑learning sites are different:
- Orders, subscriptions and user accounts can change every minute.
- Payment gateways and webhooks need to keep talking to the correct server.
- Caching has to be more carefully configured to avoid serving stale carts or account pages.
- Downtime often has a direct, measurable revenue impact.
This guide covers both types, with extra notes wherever WooCommerce needs more care.
Step 1: Clarify Why You Are Moving and What Has To Improve
Speed, reliability, support and cost: define your priorities
Before you look at new hosts, write down your priorities. Common ones are:
- Speed: Faster page loads, better Core Web Vitals, smoother checkout.
- Reliability: Fewer outages, more consistent performance during busy times.
- Support: Access to WordPress‑aware support that can help with real issues.
- Cost: Reducing total spend or getting more value at similar cost.
- Security & compliance: Better isolation, HTTPS by default, UK/EU data residency.
Rank these. A business that relies on its WooCommerce store for most revenue will usually put reliability and support above pure price.
Document pain points with your current host
Make a short, specific list of problems with your current hosting:
- How often do you see timeouts or 500 errors?
- Are backups automatic, easy to restore and recent?
- Do you have any unresolved support tickets that keep recurring?
- Are there restrictions such as low PHP memory limits or blocked plugins?
- Is the server location affecting UK and European users?
These details help you ask better questions when comparing managed WordPress hosting plans and prevent repeating the same issues on the new platform.
Set simple, measurable success criteria for the migration
Agree what success looks like. For example:
- “Homepage fully loaded in under 2 seconds from London on mobile.”
- “Checkout error rate below 0.5% and no failed card authorisations linked to hosting.”
- “No more than 5 minutes of visible downtime during cut‑over.”
- “Automatic daily backups retained for at least 14 days.”
These give you something concrete to test after the move.
Step 2: Choose the Right Hosting for Your Next 2–3 Years, Not Just Today
Match hosting type to your site: brochure, lead‑gen, membership, WooCommerce
Think about where your site is heading, not just where it is today:
- Small brochure / local business: Typically fine on quality managed WordPress shared or semi‑dedicated hosting.
- Lead‑gen with paid ads: Needs good caching, SSL and uptime monitoring. A managed platform with proper staging is very useful.
- Membership / LMS / intranet: Heavier database use, logged‑in users and more complex permissions. Aim for resources that can cope with concurrent logins and background tasks.
- WooCommerce: Prioritise CPU, database performance, caching that understands carts and checkout, and support that understands how shops behave on peak days. A dedicated or specialist WooCommerce hosting plan is usually worth it beyond a basic catalogue.
If you want a deeper breakdown of how to choose capacity, the article How to Choose the Right WordPress Hosting Plan for a UK SME is a useful next read.
Shared vs managed WordPress vs VPS/VDS vs enterprise: a quick recap
- Cheap shared hosting: Many small sites on one server. Low cost, but limited resources and often weak support. Fine for hobby sites, less ideal for serious businesses.
- Managed WordPress hosting: Hosting platform tuned for WordPress with updates, security and backups handled for you. Good option for most SMEs.
- VPS / VDS: Virtual server with root access. More control, but you (or your provider) must manage updates, security, monitoring and optimisation.
- Enterprise or custom clusters: Load balancing, multiple application servers and database replicas. Suitable for high‑volume WooCommerce or large content sites where downtime is very costly.
Managed services trade control for simplicity. A UK SME without in‑house sysadmins will usually be better off with managed WordPress or WooCommerce hosting than a self‑managed VPS.
UK‑specific considerations: data location, support hours, payment security
- Data location: Choose UK or EU data centres where possible to reduce latency for local users and help with data protection considerations.
- Support hours: Ensure 24/7 access for incidents. If most sales happen in the evening or weekends, support should cover those windows properly.
- Payment security: For WooCommerce, check that hosting supports TLS 1.2+ and modern ciphers, provides reliable SSL and does not interfere with PCI DSS obligations for your payment providers.
What a good WordPress/WooCommerce host should handle during migration
A capable provider will usually take care of:
- Copying files and databases from your old host.
- Setting up the new environment (PHP, database, HTTPS).
- Configuring caching and a CDN or acceleration layer such as the G7 Acceleration Network.
- Helping you with the final DNS cut‑over.
You will still need to make business decisions, such as when to schedule migration, how to handle WooCommerce order freezes and how to communicate with customers.
Step 3: Audit and Clean Up Your Existing Site Before You Move It
Check WordPress core, PHP version, plugins and themes
Before moving, log into /wp-admin and review:
- WordPress core version: Aim to be on the latest stable release.
- PHP version: Check via your hosting control panel or a plugin like Site Health. PHP 8.0 or higher is recommended, subject to plugin compatibility.
- Plugins and themes: Update those that are actively maintained. Note any that are out of date or rarely updated.
If your current host does not support a modern PHP version but your new host does, plan to test under the newer version on staging before you switch live traffic.
Remove unused plugins, themes and bloated backups
Migrations are a good time to declutter:
- Deactivate and delete plugins you are not using.
- Remove old themes, keeping only your active theme and one default theme (for example, Twenty Twenty‑Four) as a fallback.
- Check
wp-contentfor backup archives created by plugins or old staging copies. Large zip files can slow migration and may be unnecessary if you have separate backups.
This reduces the amount of data to move and removes potential security risks from unused code.
Fix obvious errors before migration instead of dragging them along
If your site already logs PHP notices, fatal errors or 404s, sort them out now. Moving a broken site to new hosting only changes where it is broken.
Look at:
- Site Health in WordPress.
- Error logs in your current hosting panel.
- Any recurring plugin or theme warnings.
Resolve the easy wins and log anything that you will tackle once the migration is complete.
Special note for WooCommerce: orders, subscriptions and payment gateways
For live shops, audit:
- WooCommerce version and payment/shipping plugin versions.
- Subscription plugins such as WooCommerce Subscriptions or membership extensions.
- Active payment gateways (Stripe, PayPal, Worldpay, Klarna, etc.) and any webhooks they depend on.
Check your payment providers’ dashboards for the webhook or callback URLs they are using. These should match the domain you are migrating, and you may need to test them again on the new server.
Step 4: Plan Your Migration Window and Communication
Pick the right time to move (and when not to migrate)
For brochure sites, evenings or quiet periods are usually fine. For WooCommerce:
- Avoid your busiest trading hours, ad campaigns and promotions.
- Do not switch during major plugin or core release days if you can avoid it.
- Check with your agency or developers so they are not deploying large changes simultaneously.
For high‑volume stores consider a late‑night weekday window or a period where support staff are available but customer traffic is light.
Tell internal teams, agencies and key customers what to expect
Notify:
- Internal teams: marketing, sales, support, IT.
- External partners: agencies, freelancers, integrators (for example CRM or ERP vendors).
- Key B2B customers if they depend on portal access or scheduled ordering.
Share:
- Planned migration date and time window.
- Whether there may be a brief maintenance page.
- Who to contact if they spot an issue.
Decide your tolerance for downtime and how close to zero you need
Be realistic. Options include:
- Short maintenance window: Put up a maintenance page while you cut over. Simple but may cause some lost orders.
- Near‑zero downtime: Keep both environments in sync until cut‑over, then freeze orders briefly and switch DNS. More complex but better for busy shops.
Clarify this with your chosen host. A good provider of specialist WooCommerce hosting should be able to describe exactly how they minimise downtime for shops like yours.
Step 5: Prepare DNS and Domain Settings
Where your DNS is managed and why it matters
Your DNS might be with:
- Your domain registrar (for example, 123 Reg, Fasthosts, GoDaddy).
- Your current host’s nameservers.
- A third‑party DNS service such as Cloudflare.
To find out, look up your domain’s nameservers via a WHOIS lookup or ask your IT team. Log into that control panel and confirm you can edit records.
Where possible, keep DNS separate from hosting. Using registrar or independent DNS means that future hosting changes only need simple A/AAAA record edits instead of moving all DNS zones.
Lower TTLs ahead of time to speed up cut‑over
TTL (Time To Live) controls how long DNS records are cached. A high TTL (for example, 4 hours) means changes take longer to propagate. Before migration:
- Identify the A and AAAA records for your main domain and
wwwsubdomain. - 24–48 hours before your migration window, lower TTL to something like 300 seconds (5 minutes).
- Leave other records (MX, TXT) as they are unless your provider recommends changes.

This gives you a faster switch when you update the IP of your site later.
Record all current DNS entries: mail, subdomains, third‑party services
Before altering anything, export or record your current DNS zone:
- A / AAAA records for root domain,
www, staging or other app subdomains. - CNAME records for branded links, CDN or verification.
- MX records for email, plus any TXT records for SPF, DKIM and DMARC.
- SRV or CAA records if present.
Many panels allow you to export a zone file. Otherwise, take clear screenshots. This documentation is vital if you need to roll back quickly.
Step 6: Take Verified Backups of Files and Database
Backup methods: control panel, plugin, SSH or let your host handle it
Use at least one, preferably two, independent backup methods:
- Your current host’s control panel backup tool (cPanel, Plesk, custom panels).
- A reputable backup plugin that stores backups off‑site.
- Manual backup over SSH or SFTP for large sites, using tools like
mysqldumpfor the database.
If you are not comfortable with this, your new host’s free managed WordPress migration service may include taking their own backup of your current site before they start work.
For a detailed explanation of backup strategies and test restores, see What Every WordPress Owner Should Know About Backups and Restores.
Include everything you actually need: wp‑content, wp‑config, database
At minimum, ensure you have:
- Files: The entire
wp-contentdirectory (themes, plugins, uploads),wp-config.php, and any custom files like.htaccessorweb.config. - Database: A full export of your WordPress database, including all WooCommerce tables if applicable.
A complete cPanel or account‑level backup can also capture email and other settings, but is usually heavier to move.
Test‑restore your backup or at least verify it is complete
Ideally, restore your backup into a temporary environment to confirm it works. If that is not practical:
- Open the database dump and check it has
CREATE TABLEandINSERTstatements for all expected tables. - Verify that
wp-content/uploadscontains your media library. - Confirm file sizes are plausible (for example, not 0 bytes for a database export).
Extra care for WooCommerce: freeze or minimise changes during the final sync
For shops, you want to avoid split‑brain data where some orders exist only on the old host and some only on the new. Near the cut‑over:
- Schedule a short freeze on major changes such as product imports or bulk price updates.
- Consider a brief maintenance mode during the final sync and DNS switch, especially for high‑volume stores.
- Take a second, very recent database dump just before going live on the new server.
Step 7: Set Up the New Hosting Environment Correctly
Create the new site container, database and user accounts
On your new hosting, create:
- The new WordPress site or container in the control panel.
- A database and database user with a strong password and restricted access.
- FTP/SFTP or SSH user accounts as required.
Note the database name, username, password and host. You will need these for wp-config.php later.
Match or improve PHP, web server and database versions
Confirm with your provider which versions you will use:
- PHP: Use a supported version that your plugins are compatible with, such as PHP 8.1 or 8.2.
- Web server: Many managed hosts use Nginx or LiteSpeed for performance; check any .htaccess rules if moving from Apache.
- Database: Ensure MySQL/MariaDB is at a supported version and tuned appropriately.
Ask your host to initially match your current versions if you are concerned about compatibility, then plan upgrades once you have a stable migration.
Configure HTTPS, security basics and G7 Acceleration Network / caching
Request or enable an SSL certificate for your domain, typically via Let’s Encrypt or a similar provider. Configure HTTP to HTTPS redirects and HSTS if appropriate.
Set baseline security:
- Strong admin passwords and 2FA where possible.
- Restrict
wp-adminaccess by IP for internal users if suitable. - Install any security plugin you rely on, but avoid duplicating features already included at platform level.
Work with your host to configure caching. The G7 Acceleration Network, for example, provides edge caching, bad bot filtering and performance tuning in front of WordPress. It is particularly helpful to ensure that static pages cache aggressively while dynamic pages such as carts and checkouts are correctly excluded.
Create a staging URL or hosts file override for safe testing
Before touching DNS, you should be able to view the new site in a browser:
- Use a staging URL provided by your host, such as
example.g7wp.net. - Or, add a local hosts file entry on your PC or Mac pointing your domain to the new server’s IP.
If you are new to staging environments, the guide A Practical Guide to WordPress Staging Sites for UK Businesses explains how to use them safely.
Step 8: Migrate Files and Database to the New Host
Copying files: SFTP, rsync, cPanel copy or provider migration tools
Common approaches:
- SFTP: Download all files from the old host and upload to the new host’s document root, keeping directory structure intact.
- rsync over SSH: Faster and more robust for large sites if you have shell access on both sides.
- cPanel transfer tools: Some hosts can pull a full cPanel account backup directly and unpack it.
- Migration plugins: Tools such as All‑in‑One WP Migration or Duplicator can work well for small to medium sites, but be cautious of size limits and timeouts on shared hosting.
Importing the database without timeouts or corruption
For the database:
- Use your new host’s database manager (phpMyAdmin or similar) for smaller databases.
- For large WooCommerce databases, use command‑line tools such as
mysql+mysqldump, or ask your host to import the dump for you to avoid web‑based timeouts. - Ensure the database character set and collation match or are compatible (for example,
utf8mb4andutf8mb4_unicode_ci).
Update wp‑config.php and database connection details
Edit wp-config.php on the new server to reflect:
DB_NAME,DB_USER,DB_PASSWORD,DB_HOST.- Any custom
table_prefixif you changed it from the defaultwp_. - Hardcoded URLs (
WP_HOME,WP_SITEURL) if present.
Keep the authentication keys and salts unless you have a reason to rotate them.
Search‑and‑replace old URLs safely (handling serialised data)
If your new site will use the same domain, a simple migration often will not need URL replacement. You will need it if:
- You are changing from
httptohttps. - You used a temporary domain or subdomain for testing.
- You are changing domain name entirely.
Do not run naive SQL replace queries on the database because WordPress stores some data serialised. Use a tool designed for this such as:
- WP‑CLI
search-replacecommand. - Interconnect/it Search Replace DB script (run once, then remove).
After search‑and‑replace, clear caches at both platform and plugin level.
Step 9: Functional Testing Checklist Before You Change DNS
Core checks for any WordPress site
Using your staging URL or hosts file override, test:
- Homepage, key landing pages and blog posts load without errors.
- Menus, search and pagination work correctly.
- Login and logout to
/wp-adminwork and allow you to edit content. - Forms (contact, newsletter, quote requests) submit and send emails.
- Media (images, PDFs, downloads) load from the correct URLs.
- Redirects and 404 handling behave as on the old site.
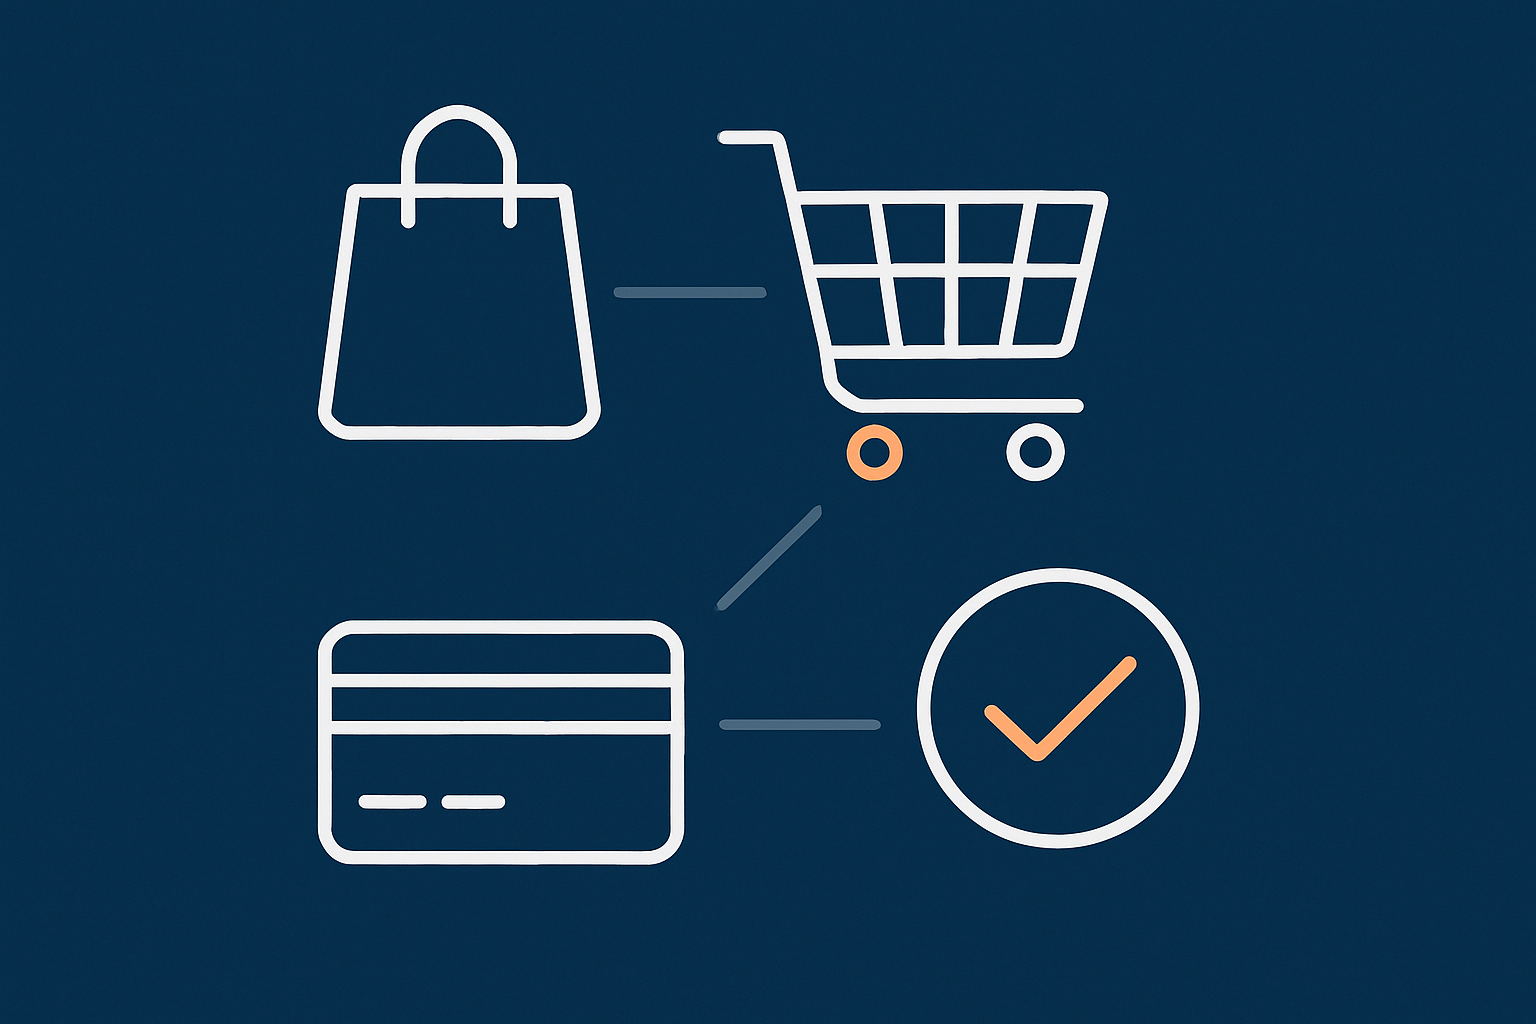
Extra checks for WooCommerce shops
For WooCommerce, test core journeys thoroughly:
- Browsing categories and product pages, including variable products.
- Adding items to cart, updating quantities, removing items.
- Applying coupons and seeing correct discounts.
- Shipping calculations and rules (regions, weight‑based, free shipping thresholds).
- Tax calculations for UK (and EU if relevant) customers.
- Guest checkout, account creation and login at checkout.
- Primary payment gateways (Stripe test card, PayPal sandbox, etc.).
- Order confirmation emails, password resets and refund emails.
- My Account area: order history, downloads, address changes.
Run test transactions against sandbox or low‑value live modes where possible, and confirm they reach your payment provider dashboards correctly.
Performance and caching checks
Check that caching is helping, not hurting:
- Use tools such as WebPageTest or Lighthouse to check TTFB and page load times.
- Confirm that logged‑out pages cache at the edge or via your caching plugin, but logged‑in areas and carts do not.
- Ensure any page‑builder previews and admin bars are excluded from cache.
If your new host uses the G7 Acceleration Network, check that its caching rules for WooCommerce are in place and that it is automatically converting images to AVIF and WebP. This on‑the‑fly optimisation usually cuts image sizes by more than 60 percent without noticeable quality loss, and it is included for all hosted sites without needing extra plugins.
Security and SEO checks
Confirm on the new host that:
- Your security plugin runs correctly and any firewall/WAF is active.
robots.txtis present and not blocking important content.- Your XML sitemaps load and list correct URLs.
- Existing redirects (301/302) still function as expected.
- Your site is not in a forced “discourage search engines” mode in Settings > Reading.
Step 10: Plan and Execute the Final Cut‑Over
Take a fresh backup and, for WooCommerce, restrict changes
Right before cut‑over:
- Take a fresh database dump and file backup on the old host.
- For shops, schedule a brief period where you block large imports or admin‑side content changes.
- Consider placing the store into maintenance mode for a very short window if you expect any data‑sync risk.
Switch DNS records to the new server
When you are confident in testing:
- Update the A (and AAAA if used) records for your root domain and
wwwto point to the new server IP. - Do not change nameservers during migration if you can avoid it; stick to record‑level changes within the current DNS provider.
- Leave MX and other records alone unless you have explicitly moved mail hosting.
Monitor propagation and user traffic
During the first few hours:
- Use DNS checker tools to see where the domain now points from different locations.
- Watch access logs on both old and new hosts to see where traffic is going.
- Keep your old hosting account active for at least 24–48 hours to catch stragglers.
How to roll back quickly if something goes wrong
If you hit a major issue:
- Revert the A/AAAA records to the old server IP using the DNS documentation you saved earlier.
- Clear caches (including any CDN or acceleration layer) to ensure users see the reverted site.
- Investigate and fix the problem on the new host using staging URLs before attempting cut‑over again.
This is another reason to avoid changing nameservers at the same time as moving hosting; record‑level reversions are faster and simpler.
Step 11: Post‑Migration Checks Over the First 48 Hours
Check error logs and uptime monitoring
Once live on the new host:
- Monitor PHP and web server error logs for new warnings or fatal errors.
- Set up external uptime monitoring to alert you if the site becomes unavailable.
The article Why Uptime Matters and How to Monitor Your WordPress Site Properly walks through the basics if you do not already have this in place.
Verify email deliverability and transactional emails
Make sure:
- Contact forms send mail to the right inboxes.
- Password resets, order confirmations and other transactional emails arrive promptly.
- Any SMTP plugin is configured with correct credentials and still allowed to connect to its mail service.
- SPF, DKIM and DMARC records are unchanged or updated correctly if you moved email services.
Watch performance, CPU and database load
Check your hosting metrics for:
- CPU and RAM spikes that may point to heavy plugins or unoptimised queries.
- Database slow query logs for problematic WooCommerce or reporting queries.
- Unusual traffic levels from bots, scrapers or brute‑force attempts.
On platforms using the G7 Acceleration Network, G7Cloud’s bot protection filters abusive and non‑human traffic before it reaches PHP or the database. This takes pressure off your server, helps keep response times steady and reduces the chance of unnecessary downtime during busy periods.
Ask internal users and key clients to test real‑world journeys
Invite colleagues and a handful of trusted customers to:
- Place test orders.
- Submit real enquiries.
- Log into portals or membership areas.
- Download resources and check follow‑up emails.
This real‑world testing often picks up edge cases that scripted tests miss.
How a Managed Migration Service Fits Into This Checklist
What your host can reasonably handle for you
A good provider of managed WordPress hosting plans or specialist WooCommerce hosting should be able to:
- Copy your existing site to their platform.
- Set up the environment, SSL and caching layer such as the G7 Acceleration Network.
- Provide a staging URL and do basic functional checks.
- Guide you through DNS changes and timing.
You will still be responsible for:
- Choosing the migration window and communicating it to stakeholders.
- Testing business‑critical journeys such as checkout or lead capture.
- Validating that analytics, CRM and other third‑party integrations behave as expected.
Questions to ask before trusting a “free migration” offer
Before you rely on a free migration, ask:
- How do you minimise downtime during the switch?
- How do you handle WooCommerce order sync and subscriptions during cut‑over?
- Will you migrate staging sites and cron jobs, or only the main site?
- What is your rollback plan if something fails after DNS changes?
- Who is responsible for testing and signing off before we go live?
A clear answer to these questions is often more important than the migration being free.
Where the G7 Acceleration Network helps after you move
Once you have migrated, an acceleration and security layer such as the G7 Acceleration Network can stabilise performance and reduce operational hassle. It places caching, bad‑bot filtering and security headers in front of your site, so abusive traffic is filtered before hitting PHP or MySQL and static content is served quickly from the edge.
For media‑heavy sites, the same network can automatically convert images to modern AVIF and WebP formats on the fly, typically shrinking file sizes by more than 60 percent while keeping real‑world quality acceptable, and it works without extra plugins or configuration inside WordPress.
Printable / Copy‑Paste WordPress & WooCommerce Migration Checklist
High‑level checklist for brochure and lead‑gen sites
Use this as a quick reference:
- [ ] List reasons for moving and define success criteria.
- [ ] Choose target hosting plan for the next 2–3 years.
- [ ] Audit WordPress core, plugins, themes, PHP version.
- [ ] Remove unused plugins, themes and large backup archives.
- [ ] Fix obvious errors and warnings.
- [ ] Identify DNS provider and export current DNS zone.
- [ ] Lower TTL for A/AAAA records 24–48 hours before migration.
- [ ] Take verified backups of files and database.
- [ ] Set up new hosting environment, database and SSL.
- [ ] Configure caching and security basics.
- [ ] Copy files and import database to new host.
- [ ] Update
wp-config.phpand run safe search‑and‑replace if needed. - [ ] Test site via staging URL or hosts file override.
- [ ] Confirm forms, media, logins and redirects work.
- [ ] Take fresh backup before cut‑over.
- [ ] Update DNS A/AAAA records to new server IP.
- [ ] Monitor logs, uptime and performance for 48 hours.
Additional items to tick off for live WooCommerce stores
- [ ] Audit WooCommerce, payment and shipping plugins, and subscription extensions.
- [ ] Confirm payment gateway webhooks and callback URLs.
- [ ] Plan migration window outside peak trading hours.
- [ ] Agree approach to order/subscription freezes during final sync.
- [ ] Take an extra, very recent database backup just before cut‑over.
- [ ] Test add‑to‑cart, coupons, shipping, tax and full checkout on staging.
- [ ] Run test transactions through each payment gateway.
- [ ] Verify order emails, refunds and My Account functionality.
- [ ] Confirm caching excludes cart, checkout and account pages.
- [ ] Monitor orders and payment provider dashboards closely for 48 hours after go‑live.
Next Steps: Turning Your New Hosting into a Stable Long‑Term Platform
Set up ongoing backups, monitoring and maintenance
After a successful migration, turn your new environment into a long‑term platform:
- Enable automatic daily backups with sensible retention, and test a restore at least once.
- Set up uptime monitoring and basic performance alerts.
- Agree a schedule for core, plugin and theme updates, with a rollback plan.
Plan future changes through staging, not on the live site
Use staging for:
- Major plugin or theme changes.
- WordPress core version upgrades.
- New features, redesigns or checkout changes.
Only push to live when tested and signed off. This is especially important for WooCommerce, where small mistakes can directly affect revenue.
When to consider scaling up or moving to higher‑tier hosting later
Keep an eye on:
- Regular CPU or RAM saturation during normal trading.
- Database bottlenecks, especially for larger catalogues and reporting.
- Traffic growth from SEO, partnerships or marketing campaigns.
If you are expecting major growth or peak events, talk to your hosting provider about scaling options well in advance so capacity, caching and bot protection are tuned before you need them.
If you would prefer not to handle all of this yourself, exploring managed WordPress hosting plans and the G7 Acceleration Network can give you a clearer view of what can be automated or handled for you. That way, your team can focus on content, marketing and trading while the underlying platform quietly stays fast, stable and secure.